How can we change the page covers on Renault Logan in 5 minutes
Title: Change for automatic lamps 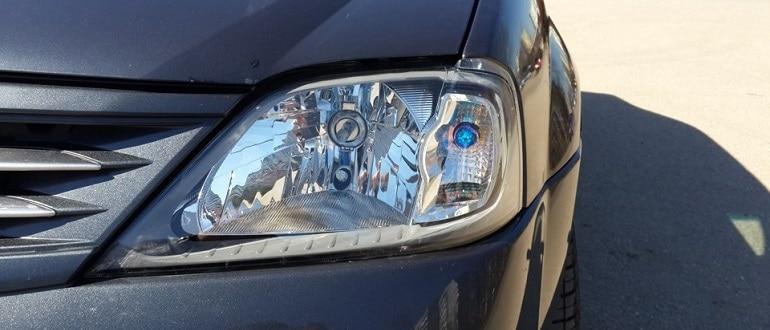
Light in the lighting devices for every stake, they will burn out all the time and all the same, when you go to the car service, then change the top, go for “repair” and they’ll stop all the lights, inclusive, go for the burn. But why are the experts here talking about all sorts of rubbish, but can you send everything yourself? In the basin, the article is more important, and we will change the page cover in the Renault Logan.
Containment: 1. Is it possible to distinguish between the generations of Logan and crushed on a lampite in tyah 2. How to use the tools and crushers you need 3. Change to the previous dimension 4. Change to rear clearance
Is it possible to distinguish between the generations of Logan and crushed on a lampite in tyah
Dnes Renault Logan ima two generations. Tya za parvi pat zapochva belly si prez 2005 in the factory at Renault Russia (Moscow) and zavarshva prez 2015
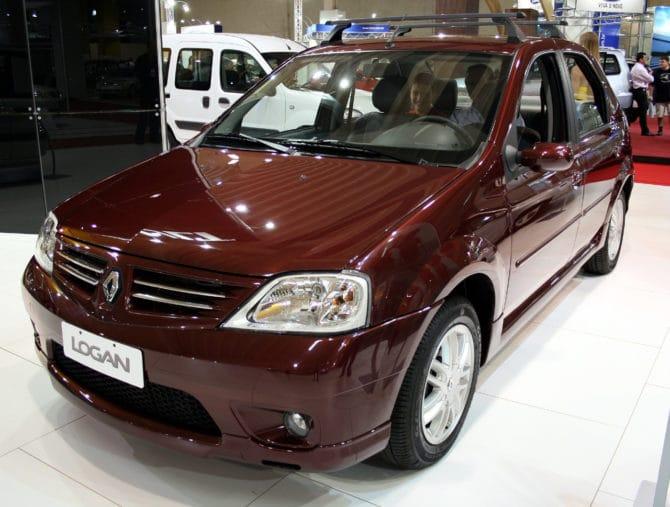 Renault Logan I
The second generation e was born in Toliati (AvtoVAZ) prez 2014, and the production continues to this day.
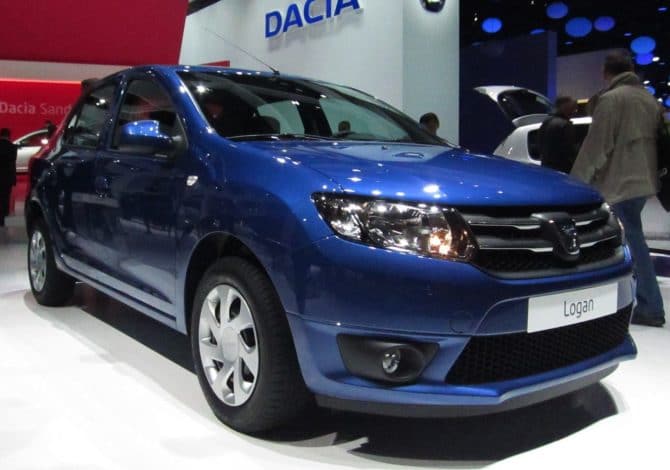 Renault Logan II
Somehow you can see from the fire of the pictures, block the headlights for generations in a slightly different way, and these differences are not self-evident, but also constructive. Regardless of the product, the algorithm for changing the page for Renault Logan I and Renault Logan II is almost impossible. The only difference is the protective coating (Logan II), some of the curve is based on the lampat with size.
As far as the back light line is concerned, the technical design has changed nothing at all, which means that the algorithm for changing on the crusher in the tye did not stop.
How to use the tools and crushers you need
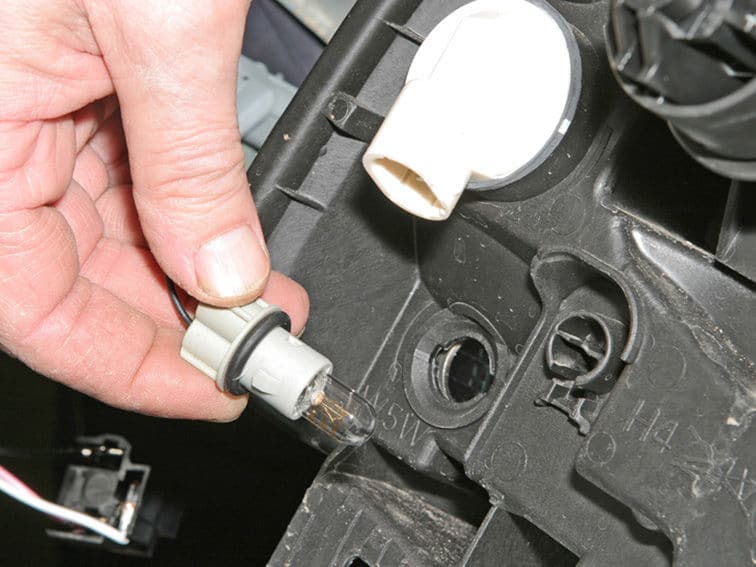
First, let's analyze some of the lamps that are used in the Renault Logan, the cato lamps for clearance. Te sa ednakvi and in two generations. In the farove, the manufacturer installed 5 W W5W devices with a pressurized switch on the headlights:
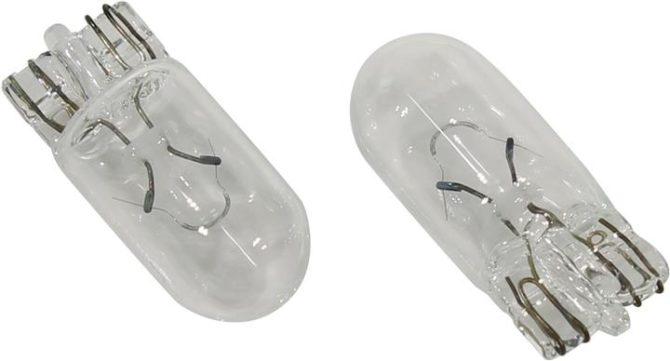 Mug W5W
In the back of the light line, there is a single device (removed from the pressable button) with two spirals - P21 / 5W.
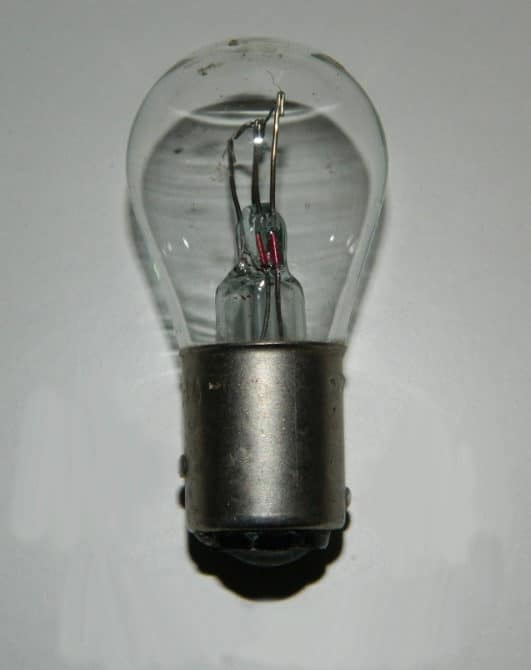 Mug P21 / 5W
Ako ima desire, togawa instead of a conventional device with a hot plug, you can install LEDs and a standard size.
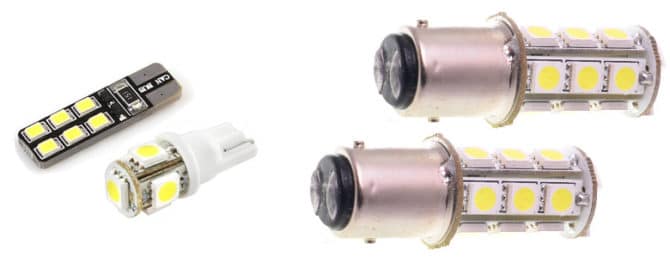
Diode analosi W5W and P21/5W
And now for tools and accessories. We do not need anything special:
- Phillips screwdriver (just for Renault Logan I);
- pamuchni rakavitsi;
- spare cups.
Change to the previous dimension
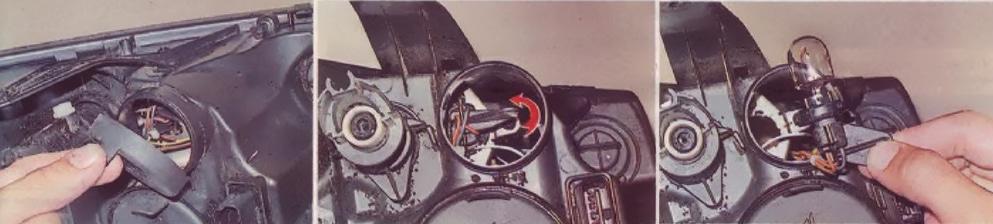
Crumpled on the page, the crumbs in the forward farov are not generally necessary for the interruption on the tezi farov, somehow they spoil the resources in the mrezhat. Dori rakata mi (and cha not nei-elegant) e in the state and reached the size of a cartridge, located on the headlight on the headlight. But no one is worried about battery, you may be premahnat. Don't bother me.
There is nothing difficult in the operation and no physical effort is required.
So, open the hood on the engine compartment and put it on and change it. Desen headlights. Put the rka in the prolukata between the battery and the case and with the end of the cartridge's namamere behind the page of the light line. Outwardly looking like this:
 Page brightened cartridge for Renault Logan I in redovno area
Turn the cartridge 90 degrees back on the clock hand and go out of the way with the crank.
 Suspended cartridge for page lightness in Renault Logan I
Razglobyavame krushkata, kato I’ll just wear out and put a new one on her locality.The next step is to reverse the action in reverse: install the cassette on the meat and fix it, which I turn 90 degrees on the hour hand.
On the left side of the headlights, it’s a little more difficult, it’s a lot of tight space and more shaking and you’ll reach the cartridge, remove it from the main light block. Rkata more plzi into the tozi slot, but yours is not there, then more shaking and partly breaking the headlight. The pile of plastic is protected by a hood from the hatch on the main light.
 Dumped on the protection capak from the hatch on the main light
Turn off the storage for the main light, then turn off the connector. Dump the gumenoto seal.
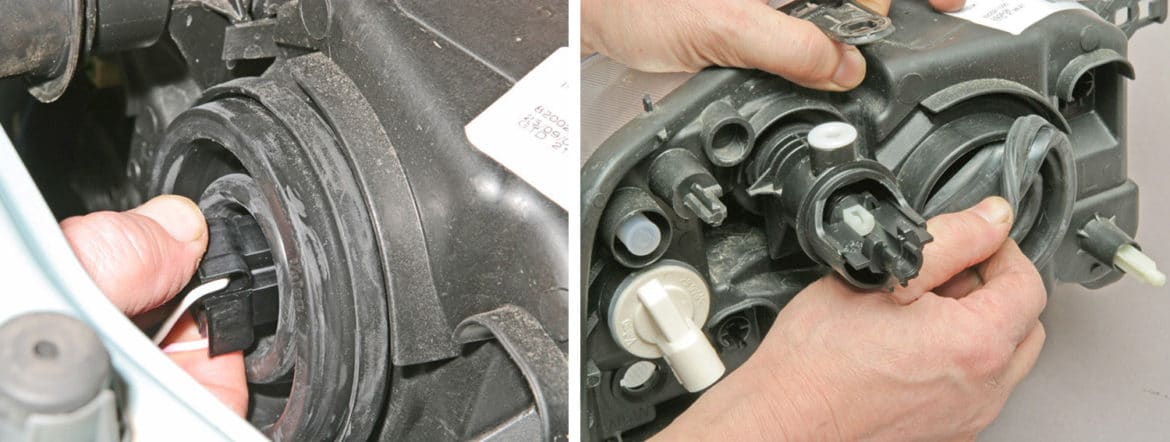 Premahvane to protect the substrate and gumenoto seal
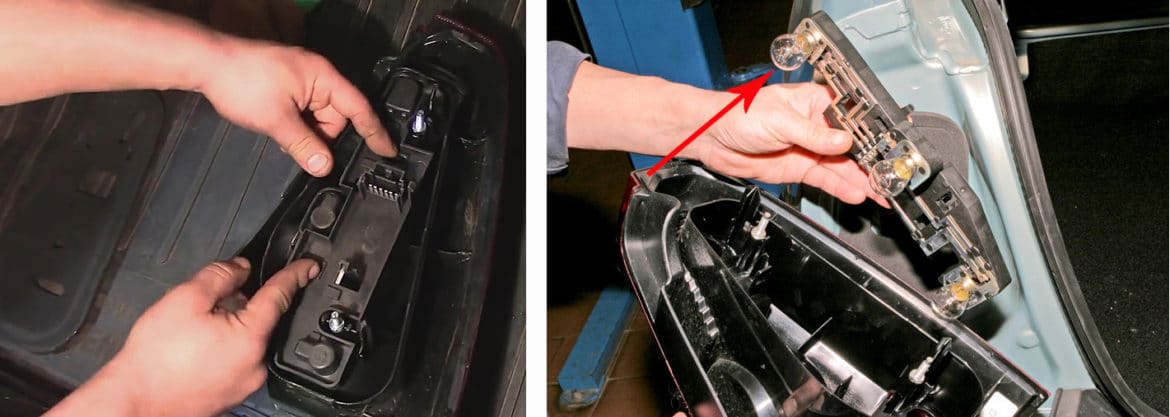
As a result, on tov prazninata, you’ll be more likely to go out and more forested and crawl into it. After eating the beginnings of the premahvam cassetata, changing the krushkat, putting the cassetata, not taking it away, let's put the seal on the cuffs and let's remove the main block for safekeeping from the light.
For the owner of the Renault Logan II, the process of crushing on the front page of the crusher is not significantly different. The only difference is that the page cover is covered with a protective capak. Zatova izvrshvame follow the steps:
- Opipwame and mahame kapaka (malk).
- Opipvame and izvadame patron (through zavartane).
- Change lamp.
- Put on the cassette and put on the capac.
 Changed on the front page of the crash in the Renault Logan II back kjm sdzharzhanieto ↑
Change to rear clearance
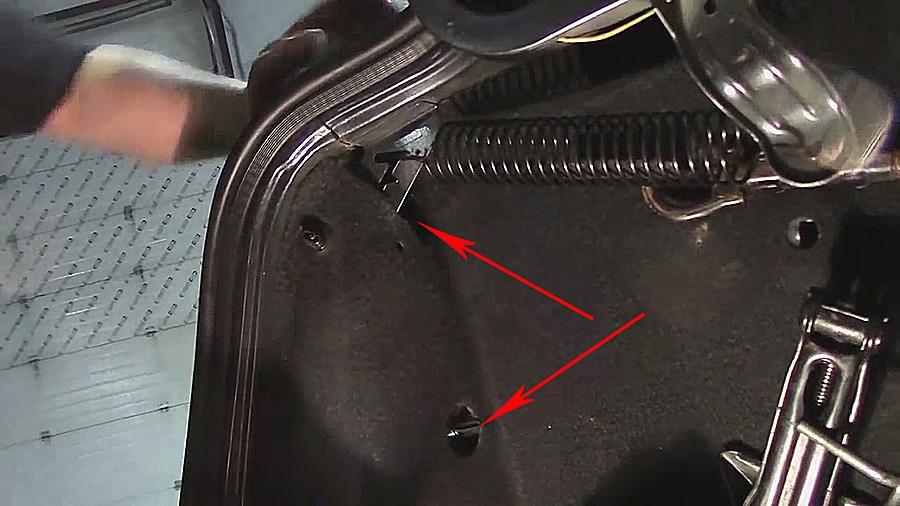
The rear light lines on the Renault Logan I and Renault Logan II are almost identical in design. The only difference is that in the first generation of Fenercheto, it is fastened with a Phillips screwdriver (second generation - plastic nuts behind the screw) and the key on the main scarf 5, not 2.
Some first time to see the process of changing to the rear light lines (those are the lamps for the stop light line) with Renault Logan II, this kato tazi modification is most crossed in Russia. First of all, develop the plastic nuts and fasten the plywood. Those are the directions for the format on the agnet, but the key is not necessary.
Location on the rear light brackets in Renault Logan II
Now premahvame fener: swinging and attentively pulling back along the sap to kolata.
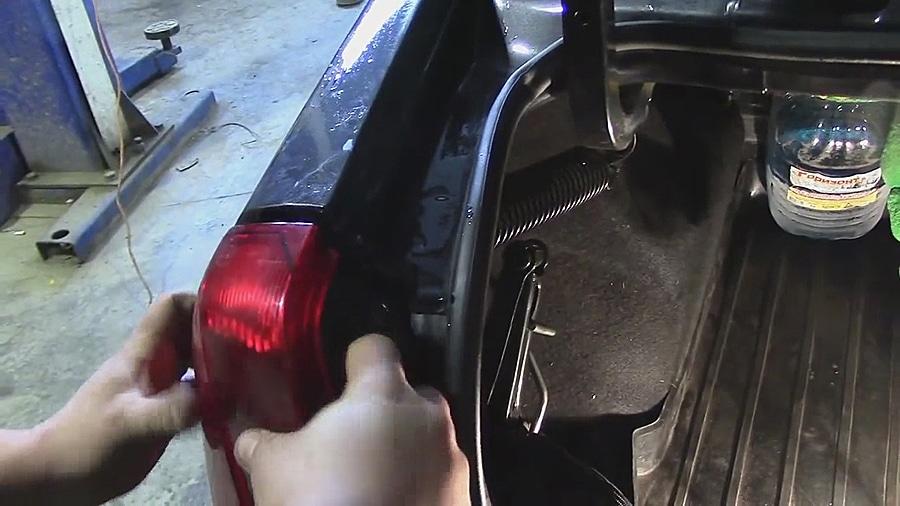 Premahvane on zadnata svetlina
Unplug the secure connector, then press the key switch.
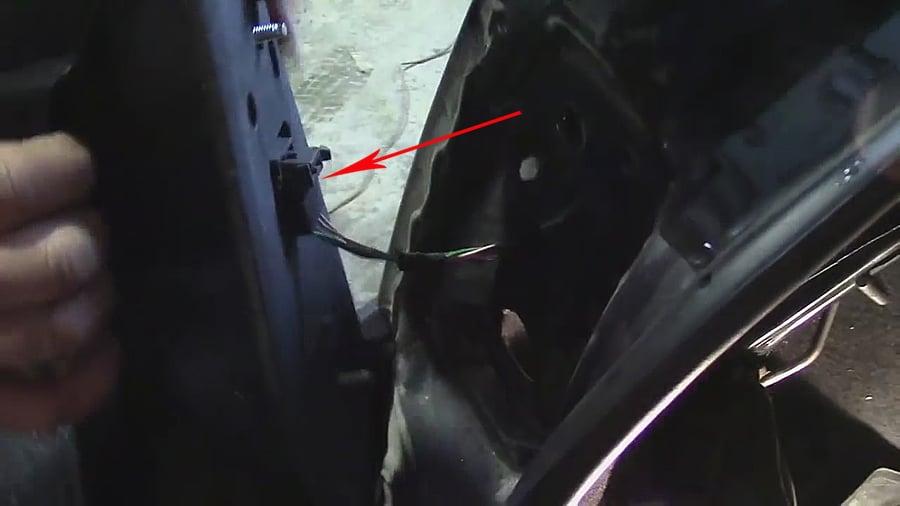 Protect the terminal is safe with butalo
Place the device with the face on top of the surface and remove the seal.
 Premahvane for sealing
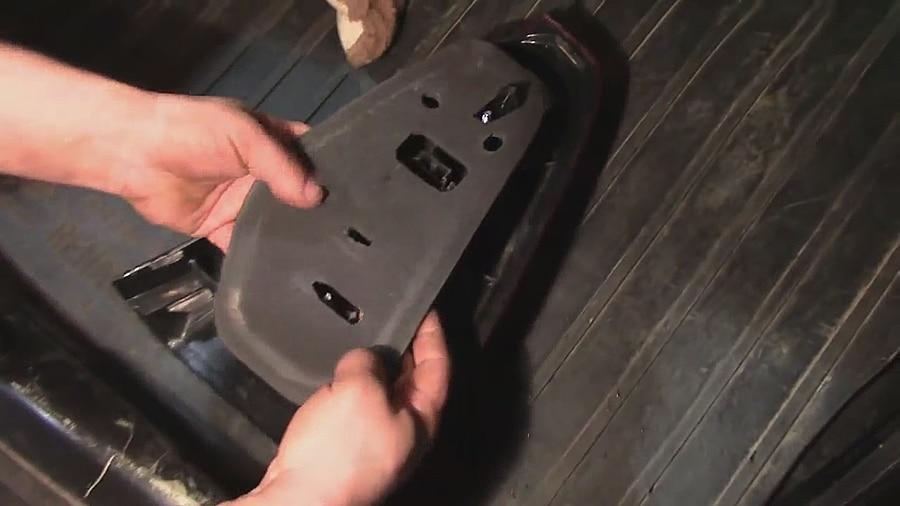
Dashkata with electrically plugs is secure with two keys. Izstiskvame gi and mahame daskata.
 Premahvane on a scarf from the crush
Markirah ss arrow lampat, excusable for size. That se was removed through a light onslaught and turned back to the clock hand, dokato spray. Change the lampat at work, install the scarf on the ground, connect the conservator connector and attach the headlight.
With Renault Logan I, the action is slightly different. In the first place, premahvam is often from tapiceriyat on the trunk before the lampata. Under the taper, we can also see two self-tapping screws, located on the right side of the hole, tighten the nuts in the Renault Logan II (see the picture above). Excludes a gi with a Phillips screwdriver and premahwame fener. Stop the steps for the change on the page of the crumbs sa similar. The only thing that can be mounted on a lampata in Logan I can be mounted on two or loop switches - depending on the modification to the lampata.
From the bottom, the head of the vitch was crushed on the page of the knuckles in the car Renault Logan. If you read the article carefully, you can do it yourself with the tazi task, you can separate it from 5 minutes and for a crush.
PreviousChanged to an automatic lampNextChanging to an automatic lamp