How do you lighten up the lighting with LED strip
Title: Backlight 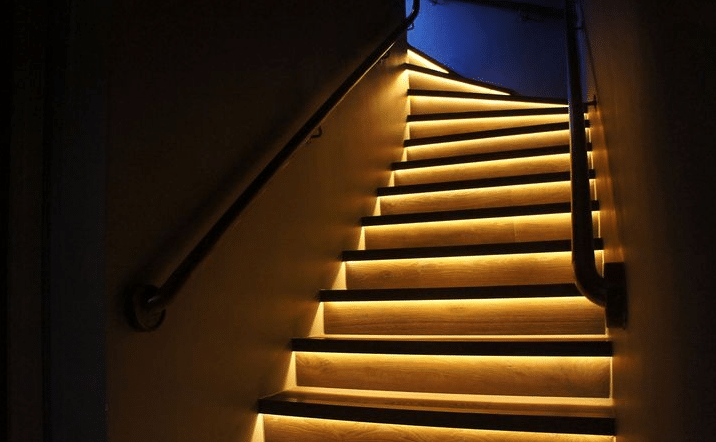
It is pumped up or lowered along the pillars into the dark flock and it is quite dangerous and inconvenient. Before tov horata byaha forced them to turn on the common light, for yes they pump on the stalbite. Today, both of them, a practical solution to the problem is lighting on a pole with an LED strip. This solution guarantees safe operation on the pillars in private houses, closed between the floors, and somehow in the pools. Ako correctly set up and organize the mode for work, illuminate the interior favorably and also save consumers from a lot of inconvenience.
Containment: 1. How did you choose a pandelka and additional materials? 2. Selection for color and brightness for lightening 3. Instructions for installing screed by screed 4. Calculating the material 5. Rely on the phone 6. Consistency on the line 7. Without motion sensor 8. Veriga on the sensor for movement 9. Rules for safety during installation and connection 10. Prepare solutions
How did you choose a pandelka and additional materials?
The source for artificial light for clarification is more than self-sealing diode tape. Product sales lenti from gavkav polymeric material, the top of which is the installation of LEDs and resistors with a defined frequency. Elements can be combined into a single system to create a thin substrate, some of the current.
This is an alternative to this tape using diodes in the body lighting barrier. Those samontirani in the kuhinata on the steppalata or in the wall of the page close to the wall. For yes, they are supposed to clear the stream from the bright light, these are the lighting of the body of the equipment with a special grille. But the Tazi option for clarification is significantly lower from the tape diodes.Illuminate the bodies and the complex installation is rather complicated, just try to direct the socket for every lamp, and put the channels behind the conductors. And there is one more drawback from the high price.
 Characteristics and marking on tape
Criteria for choosing a tape:
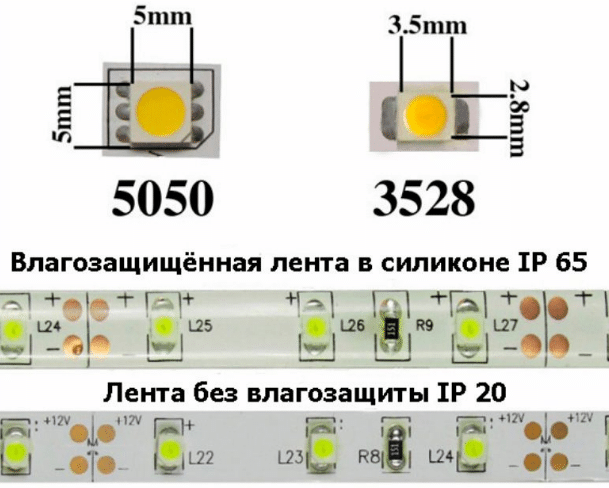
- Newly popular LED tapes sa SMD 3528.
- If you need a brighter lightening on the stupala, use the SMD 5050 LED strip.
- An important parameter when choosing a tape is more often cast on a diode element in a single meter. Optimal clarification on the table is available from the option, including 60 diodes per meter, but for a model with a light-emitting diode: from 90 to 120 elements.
- Thy kato se planira and pervert clarification on the stalbishcheto, trembling and persecution for protection at the source of light from moisture. For yes, prevent breaking on the LEDs in time for wet cleaning, but choose models with degrees IP67 or IP68. Tape the equipment with silicones a protective layer, which prevents water from falling on the top of the conductive parts, preventing the connection.
Preferably, yes, buy a tape from 220 volts. Toy ima follow the prepositions:
- Forest installation.
- Niska price.
- Nyama need and save your devices.
- If you damage any of the elements, that one can be replaced without a problem.
List of required materials and installation for backlighting:
- LED tape.
- Save the drivers for the diode sources.
- Conductors.
- Profile for laying on electrical conductors.
- Fastening parts: staples, screws, connectors or connectors for cables.
Required tools:
- Electric drill or screwdriver with high power.
- Roulette.
- Knives and knife.
 For szdavaneto on Tozi kind of clarification sa necessary simple tools. back kjm sdzharzhanieto ↑
Selection for color and brightness for lightening
Byaloto e optimal svetlinen bloom for illumination on stepala - the same osiguri illumination on a whole cemetery. But if you look for it and get bright effects for transforming on the interior, choose flower diodes:
- Green.
- Syn.
- Sorry.
- Cherven.
- Signo and others.
Do not take away what the backlight is installed in the first place for convenience, and secondly - for beauty. Choose a color temperature from 3000 K, which with Tosi indicator is clean and pleasant for some lightening. If you choose hard, bright sources, the light is still dazzling.
Instructions for installing screed by screed
- At the first stage, mark your installation for lighting. Choose the optimal location for fixing the cable and profile, by installing the device, which controls the lighting. Choose and start on a montirana on a light source.
- In the second stupa ce szdavat dotted for fastening. With the help of an electric drill, you will direct the holes, which will prevent you from fixing the details on the backlight.
- Tretat grout and install the profile behind the electrical cable and the diode tape with pre-soldering the conductor behind the connection to the safe.
- Fourth mortar and cut the LED tape on the parquet with the necessary length of the mark, applying it at the top. Use a double-sided tape or a backing pad, and then cover up the tape with a diode tape.
- Petiyat stage - predi yes instalirate kabelevaneto, take a decision for the type of control on the backlight.
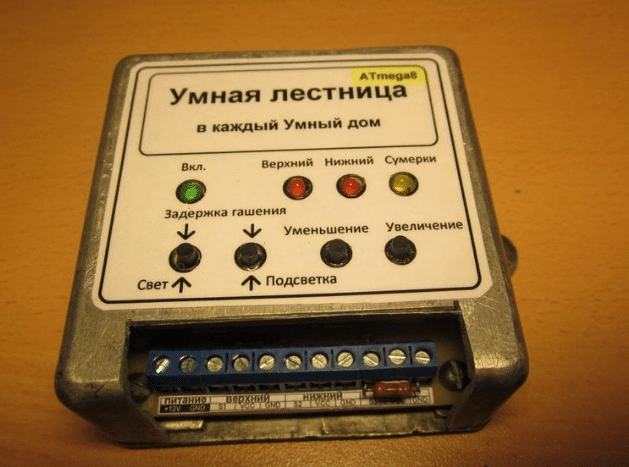 Device for setting up "intelligent" camp lighting
How can we choose a lighting scheme?
The main task is, yes, and all the same, the solution for the location, then for clarification, then for the stepkite:
- In the wall.
- Down below.
- Suspend.
- For every second step.
- Tsentar or full width on stepaloto.
It is necessary to eat and decide how to control the diode tape:
- Inclusion on svetlinata with a pre-switch with a bud.
- Enable and disable ss sensor for changes.
- Izpolzvane on preminavasch prevklyuchvatel.
Please note that the actions depend on the choice of control for lightness.
Varieties on the scheme for the execution of the camp lighting:

- Nay-forgive the option e yes use the prevklyuchvatel. Under the step-like hangers or on the surface, remove the blind tape from the diode. Turn on the backlight with the help of the bud, located in a convenient place for you. Svetlinata still shine unpretentiously, if I don’t rule it out. Constant light is good, but electricity is consumed.
- For yes, this optimizer works on a simple chain, in which a relay can be included in time, in the case of light, it turns on and off at a certain time. Tova decision is more helpful for painting on energy consumption.
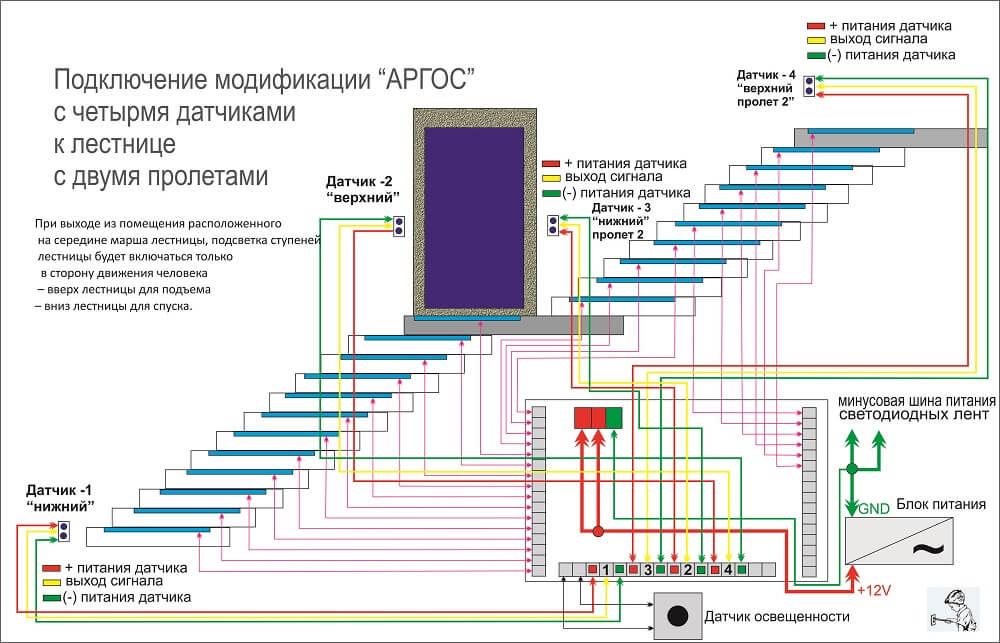
- An intelligent automatic scheme is based on the interaction of the sensor with the controller.
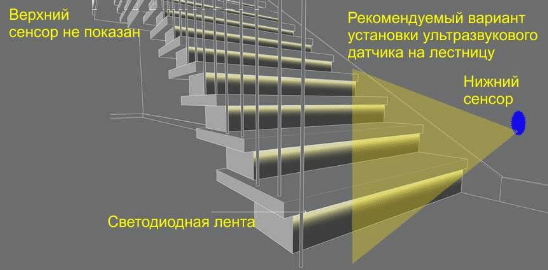
In the automatic chain of sensory sa montirani I will cross the parvata and the last stupka. Vednaga trail kato sensor detect movement, the controller's LED on the source sends the signal and lights it on, for yes, illuminate the bird on the person who is on the hill or down.
Any chosen scheme can be adapted and improved. For example, if you put multi-colored LEDs behind the cemetery, then you will change the whole view to the backlight. Another interesting solution is to put sensors on every step.In Tozi, the case is still light consistently, so move it for a while. Tova's solution is both a work of considerable material discord.
Calculating the material
Any chosen scheme can be adapted and improved. For example, if you put multi-colored LEDs behind the cemetery, then you will change the whole view to the backlight. Another interesting solution is to put sensors on every step. In Tozi, the case is still light consistently, so move it for a while. Tova's solution is both a work of considerable material discord.
First, calculate the debt and Store on LED tape... Optimum power stability of 4.8 watts per linear meter with 60 LEDs from the SMD 3528 type. It’s better to use the source to the bright light with a cold radiance - that favorably outlined the beauty of the steppalat in the dark. Choose to bloom, but it’s always a matter of taste.
Calculate the length of the ribbon, which will take the foreseeing of the broya and size on the stupkit on the stulbite.
The next step from the calculation is to determine the required capacity for storage. For yes, send the tov, if necessary, multiply the consummation by energy by one meter from the tape, if necessary, measure. Ako tryabva and use a 10 meter tape for clarification, tryabva and multiply 4.8 by 10, you get 48 watts - a commodity power, which is a consumer of tsyalat long for a tape.
Determine the consumption of energy. It is secured both ways and ima margin of about 20-25 percent. Therefore, add another 25 percent qm 48 vata, you get 60 vata. According to Tozi, the necessary power for storage is still 60-80 watts. Tova completed the calculation for background clarification.
Rely on the phone
Produce svetvatat and hide the tape in a special kutia, for yes, I expect from freezing and moisture. For every stupka is illuminated, this is the right to slagvane, for some reason you should avoid damage. Tazi substrate is made from aluminum profiles. Tryabva and close up the ribbon on top of him. For yes, send tov, naryazvame lentata to the segments with a long length, corresponding to the width of the stupala. Equipped with rims on lentite with conectori.
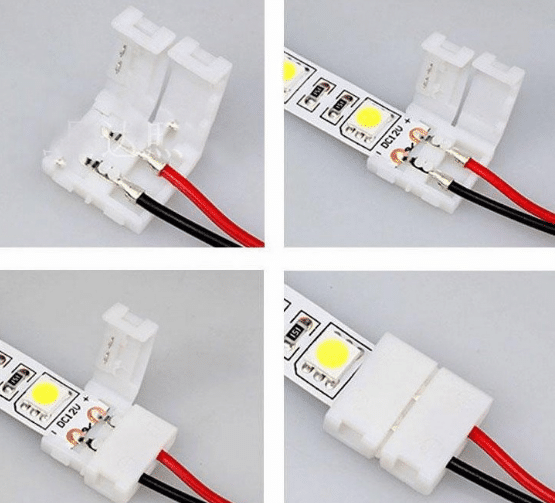 Conectory for LED strips
Degrease the surface, let’s apply a tape, and conduct a tryabva and get it out of the fasteners and pass it under the stupala. On a single participant, there is a fixed cable channel, there is a conductor from every mortar. I will cross the first stage and the last stage of the place for the montirana on the sensitive sensors, so you can use the scheme for automatically connecting.
Use it on the cable channels and allow you to hide the conductor. Look out naturally. It is possible that you will choose flowers, some will dissuade you from your steps.
Carvaneto on a cable, and all perverts without a channel - above the stupala. But in this case, the view of the columnar system is even worse. Nay-dobriyat option yes, put the conductor in the open, but the goods are not possible in all cases.
Consistency on the line
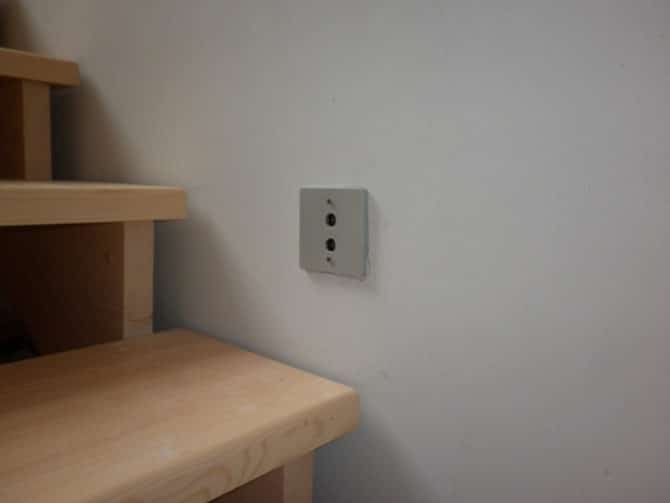
- Choose a location on Kutiyata for the installation. It is prejudicial to put it under the pillar on the ground, somewhere else in the forest, and suppose the guides are in every zone.

- Punish the conductors from every stupka kam zadnata kutia. Do not pick up and mark the conductor with the marker when laying. On tyah you can and stick up stickers with thixo, so in the future and not se barkate from where and two all the way to the conductor.
- I suppose the conductor to be mounted on the sensorite, as it is from the use of an automatic chain.
- Pierce the conductors for interrupting the switches, install at the beginning and ends on the pillar.
- Install the controller in cutiyata.
- Svrzhete conduct kam answer the nests on the ward.
- Protected. Do not use the platen copper conductor for a secure connection. A convenient solution is to use it on a multi-core cable.
- Carefully look at the chart and the sequence, they gave the wires of the conductors to connect correctly, they gave the “plus” and “minus” not to cut off, they gave the marking for the connection on the cable on the sensor and on the block for the control of the connection.
- Start the lighting system and direct the settings.
It is important that the mounting surface is even free of grease. Ako tryabva and fire the ribbon, I’ll put it on, don’t take it, the minimum radius on the edge is 2 centimeters.
Tryabva and work with protect the conductors. With any model of tape, there are usually a lot of conductor contacts and some of them are present, then the quality is not good at soldering. You have to try the soldering iron, for yes, change the contact conductors. Use the tool with a low power - up to 40 watts, so the LEDs and do not get hot when soldered. A suitable section on the body is 0.75 mm, and the length is from 20 centimeters. When you install a single-color tape, you need to shake two conductors - red and black. Distinguish in color on the conductor sa necessary, specifying not all polarity: black and white would be “minus”, and worm and white would be “plus”. Aco ste chose an RGB tape, take the conductors from a few colors: blue, red, black, green. Comrade wi help and avoid confusion on the flower channels, kogato connect the tape of the controller.
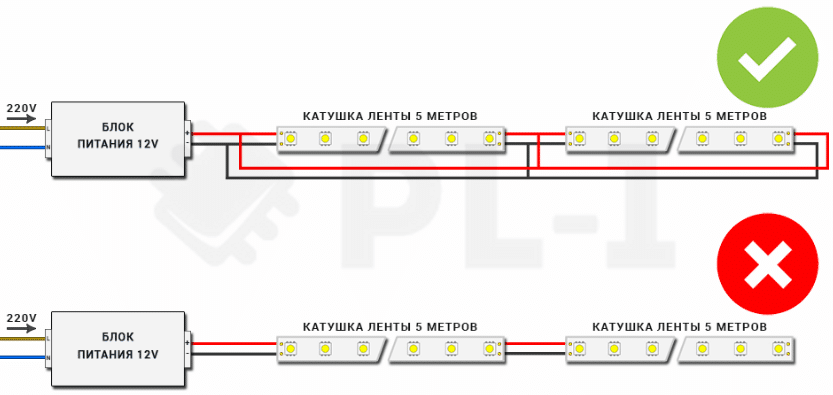 Schemes for wiring on LED tape: correct and incorrect
Divide the borders on the conductor from the country to the ribbon up to 0.5 centimeters, and from the opposite country up to 1 centimeter, then sing some of the ribbons, but this is not the way to go wrong. Put the contact on the top edge of the edge on the conductor. This decision is based on the quality of the contacts in the terminal block on the storage block. Use the crimp, fasten the conductor in your ear, and make good cuts.
Don't take it and isolate yourself on a drunken spree. Nai-dobriyat the tool for the product of the heat-sealed pipe. The isolation process is simple:
- cut a little brocade from the trbat;
- put him on the ground, where it is pervertedly soldered;
- heat up the trbata sas construction sesoar with a tyasna nozzle, such a toplinate and don’t get into the top of the LED;
- ako nyamate seshoar, use a friend of the source on the toplin.
The result is sound insulation and reliable soldering on cables. Not all damage is used on the insulating tape.
Without motion sensor
LED Grassroots lighting without motion sensor Foreseen used on standard transitional or marching switches. There are two pre-switches installed. Firstly, it’s a place, somewhere the soil is a stubble, and secondly, it’s a place, somewhere it’s over. For such a system, please set the timer for lighting, and use it conveniently to crawl to the camp lighting and save electricity. You can also turn on the lightening in the dark by itself without the definition of a period, and the trace of light will go out automatically.
Takiva devices can and have some modes of operation:
- The main mode of this is from crawling for lighting on the naked housing space.
- The night mode is distinguishable from the first option from the calm, the light is muted, which is not blindly clear.
- Difficult mode - osiguryava work on LEDs and in two furnaces of the mode.
The consumer is inventively set to the necessary mode on his own, depending on his preference.
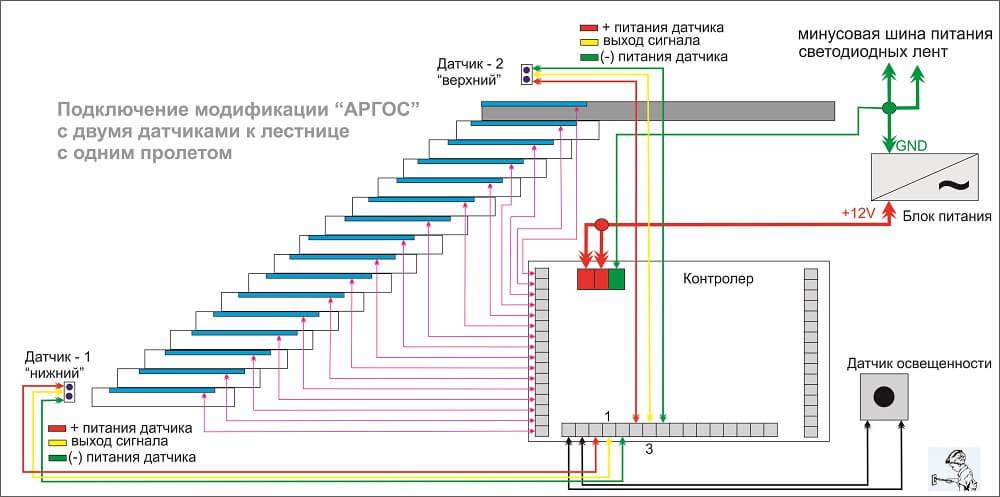
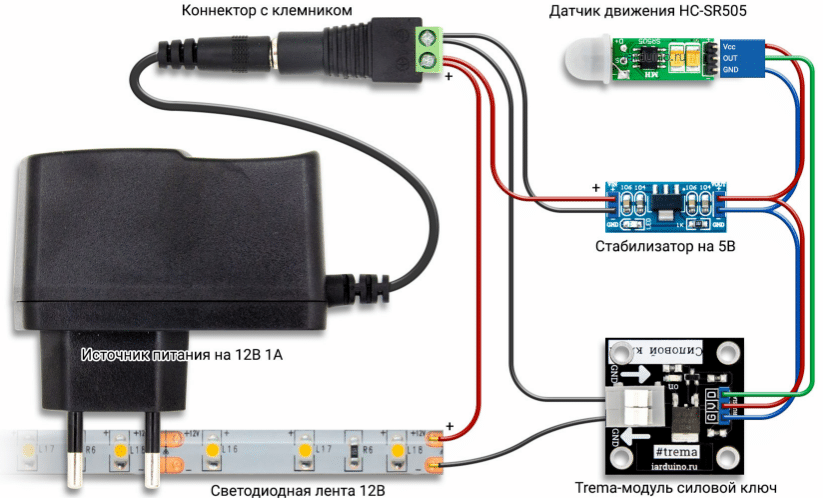
Veriga on the sensor for movement
Schematic including:
- Protected.
- Controller.
- LED tape.
- Automatic block for control of the ss sensor.
The basic elements in the basin are the controller circuit, which controller is powered by an LED source. The task of e and a guarantor is rather small, that the system of the se starter has a trace of the signal received from the sensor, which gradually turns on the tape under the steppalat.
 Sensor, installed I cut the top and bottom
Expert advice and use the Arduino controller. The standard model includes 15 outputs, some of which is enough for homemade tables. For yes, install the device, it is prejudicial to use a suitable handkerchief, but in any case they rule without it.
Osventova works on the system and depends on the driver on the LED element. The driver is a compact device, some kind of current stabilizer, connected to the controller. Turning on and off on the lightline depends on the sensor for the final cut.
Ask for electricity and save resources for the system, and it is necessary to install a photocell, so LED lamps for pillars do not shine the day. Linked to the LED strip of infrared sensor forest. A device for mounting adhesives into housings, for connecting electrical cables and for storing tapes.
 Veriga on the sensor for movement back kjm sdzharzhanieto ↑
Rules for safety during installation and connection
Installing on the LED tape is a simple process. Dory and a non-professional can still work with a tasi, which he sent all efficiently with his own sir, but with the condition that yes, you need safety rules:
- Do not expose the LED tape to mechanical impacts or emissions.
- Once again, correct the lines, be careful not to damage or destroy the railroad tracks on the scarf.
- Mounting and fixing on LED products, as well as the procedure for linking to stored, it is distorted due to safety when working with electricity.
- Strictly space out the polarity during installation.
- For preference, in parallel, they are connected.
- Do not take it away and pretend to store it with a general stock of goods at the source to light. Not all tolerances are used to store little by little power from consumers to tape.
Prepare solutions
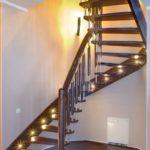
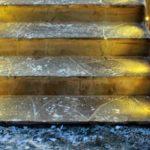
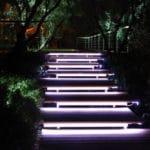
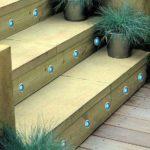
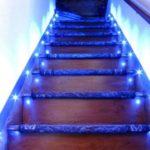
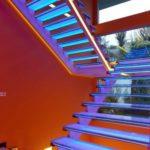
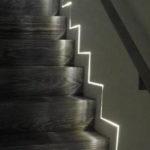
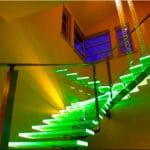
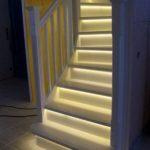
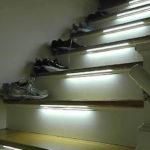
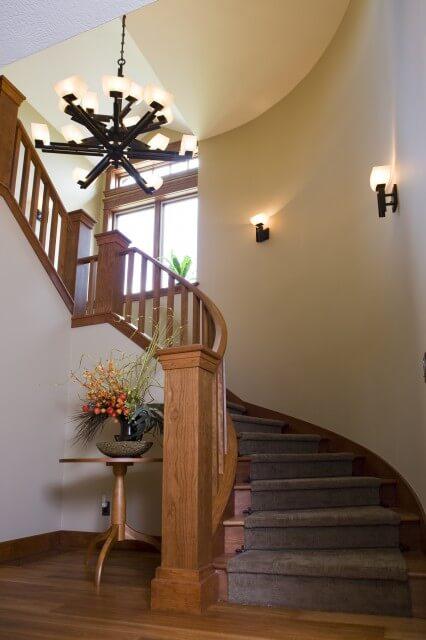
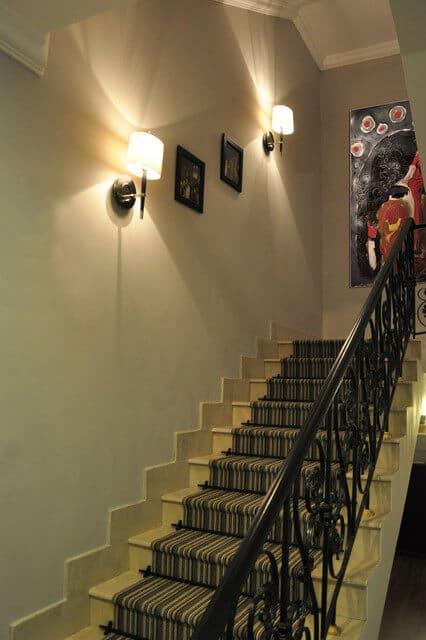
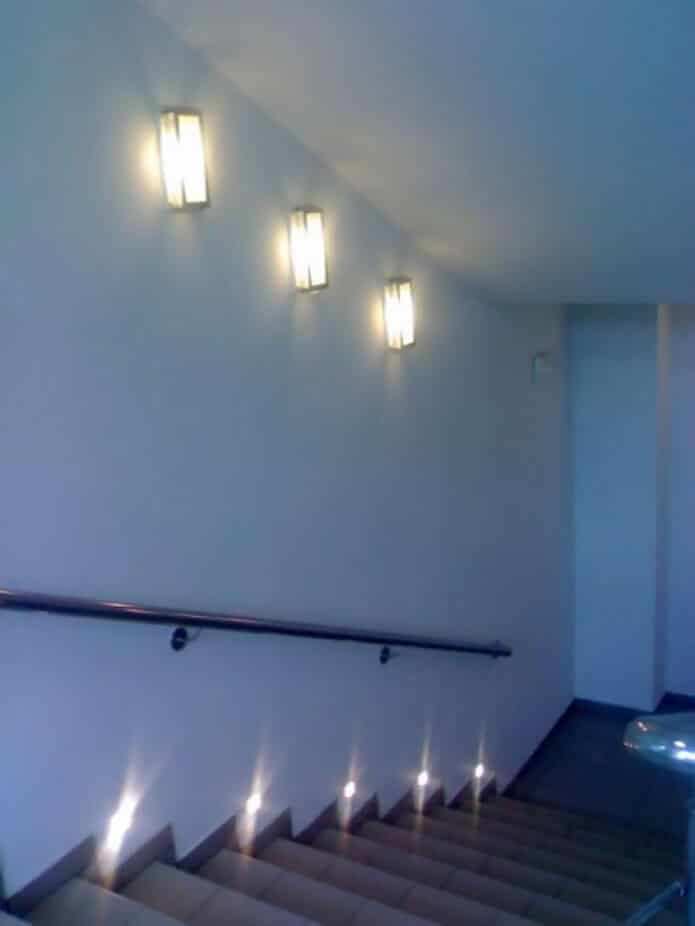
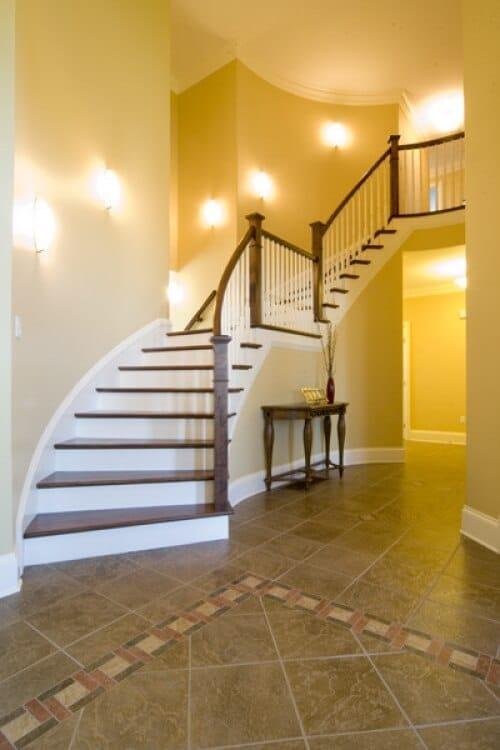
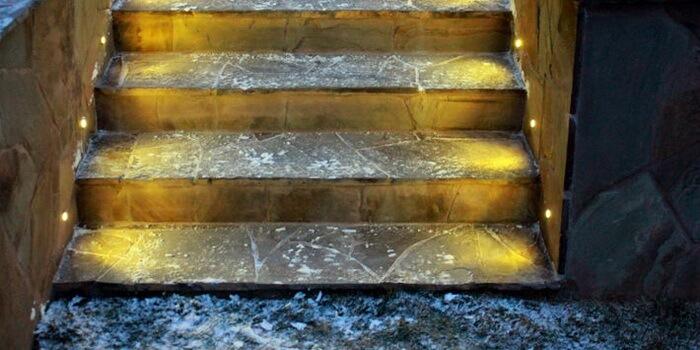
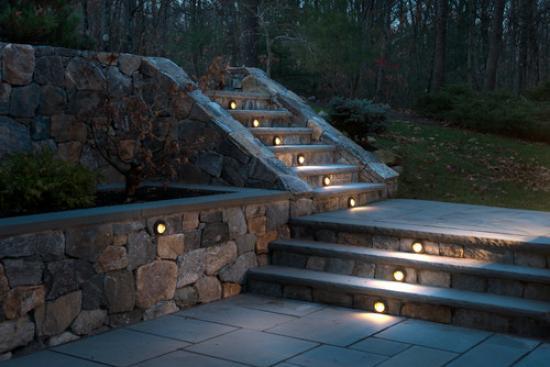
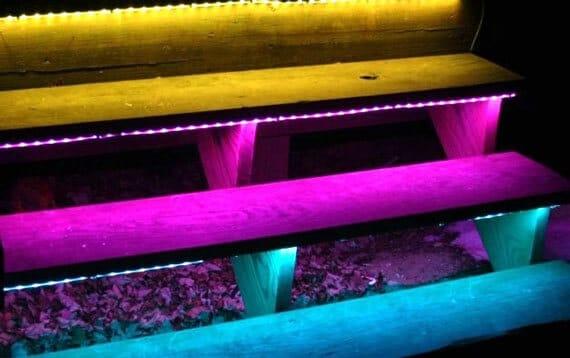
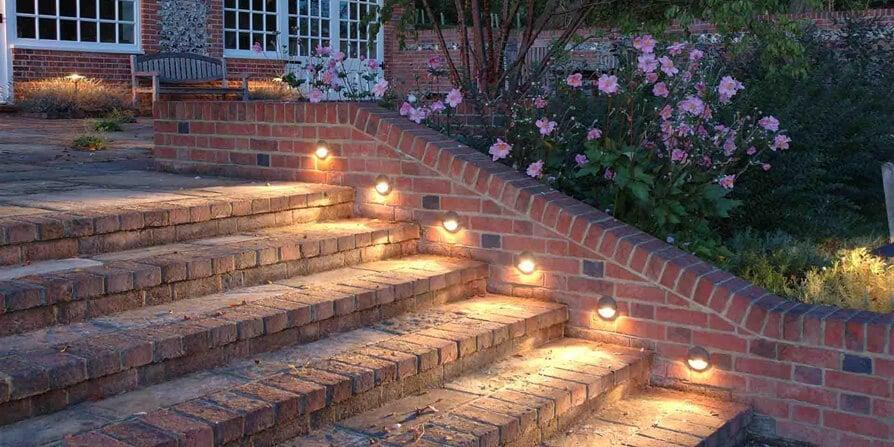
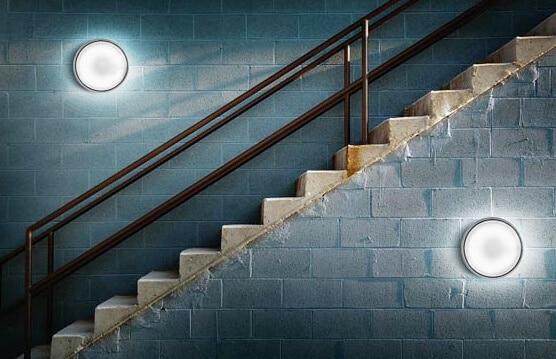
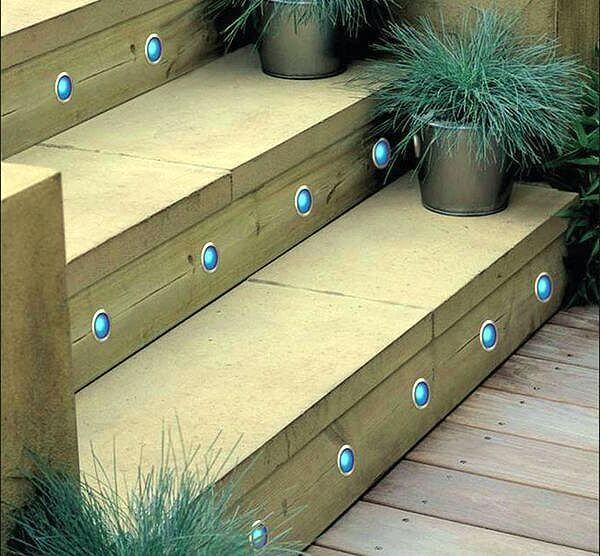
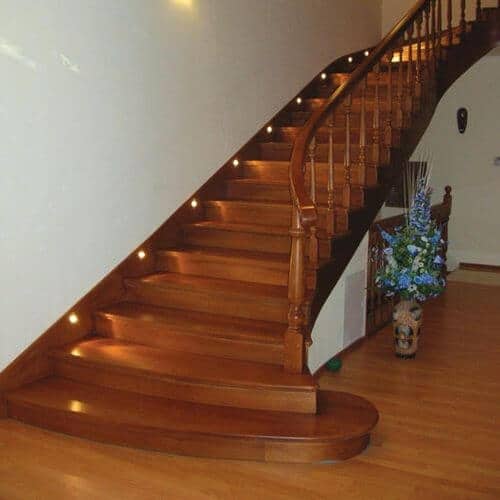
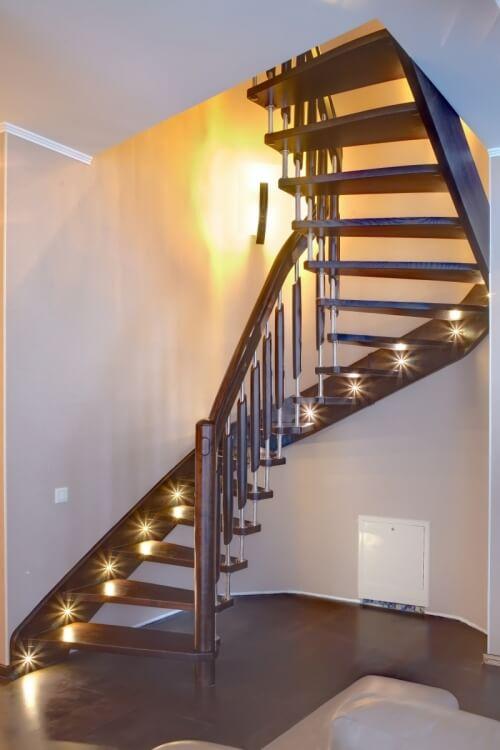
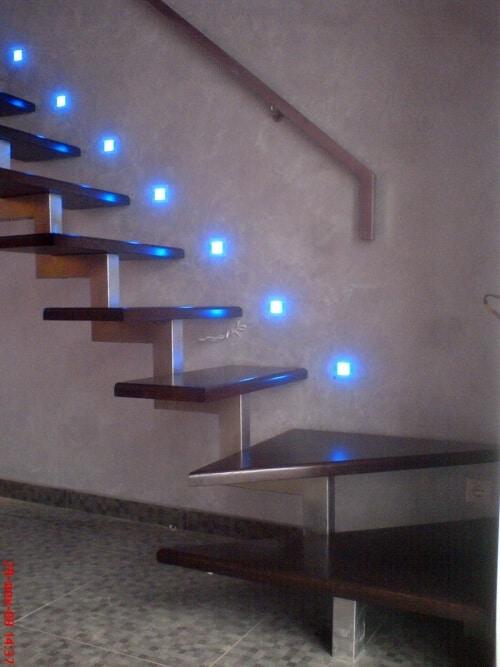
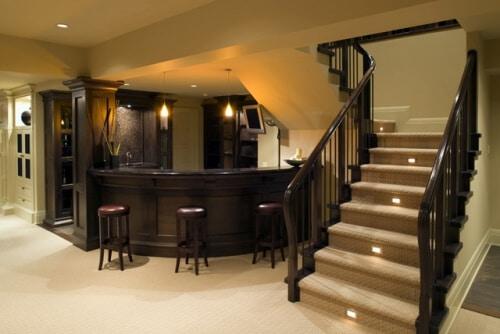
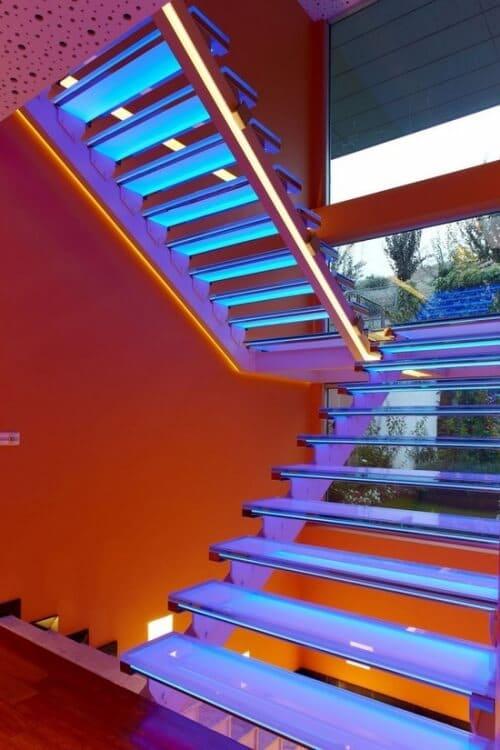
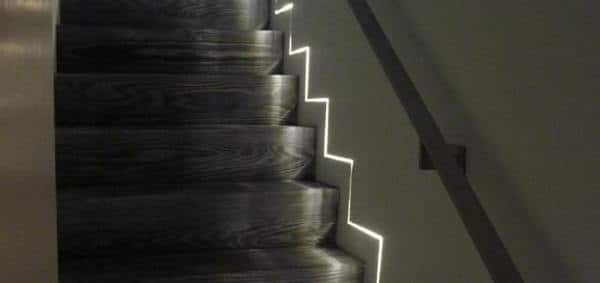
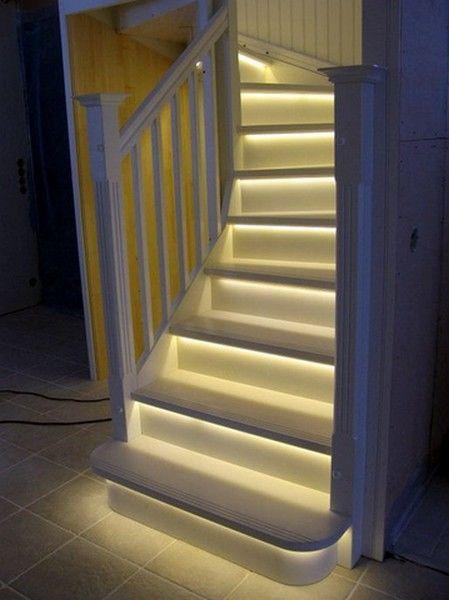
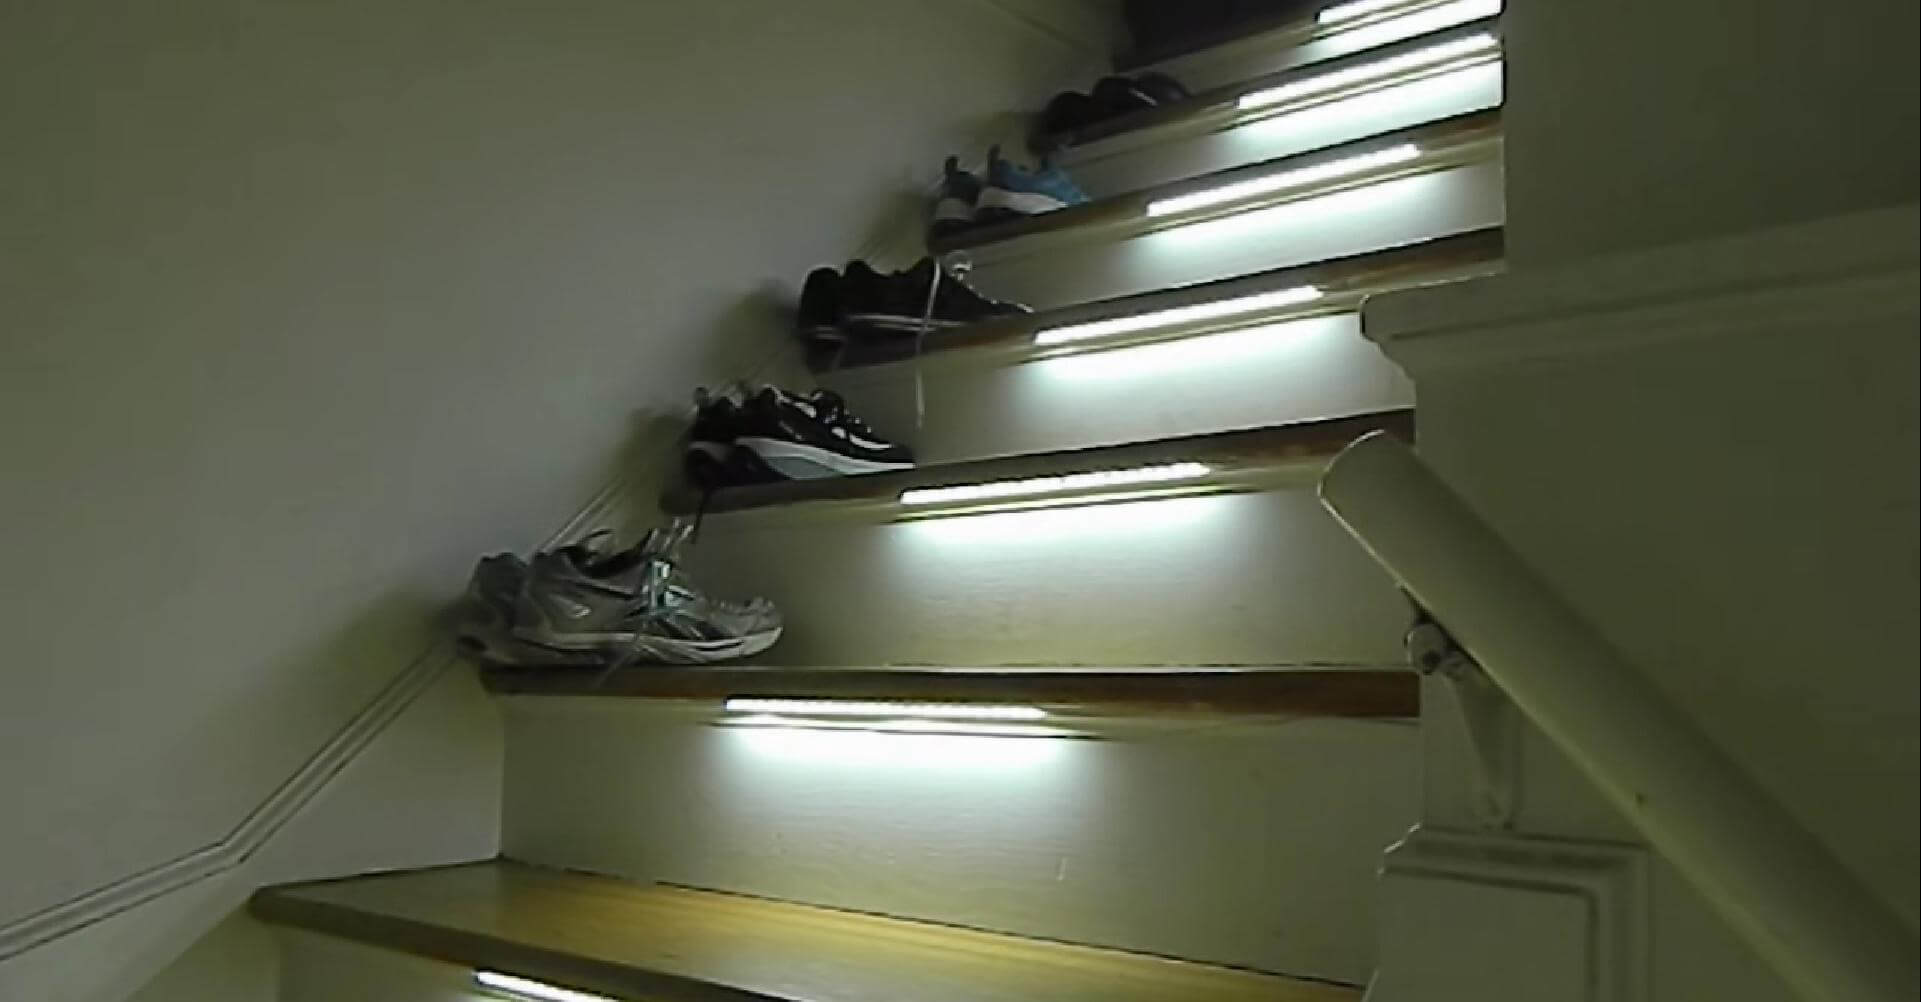
We have specially selected for you various pictures for ideas for lightening on steel, for you to inspire and choose the most suitable option for your own conditions.
- Lampi by pillarbite:


- Clarification on darveni, concrete and stone stepala:

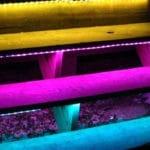


- An example for using the spotlights in the interior:


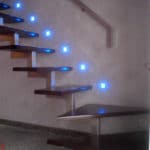

- An example for the attached LED strip:


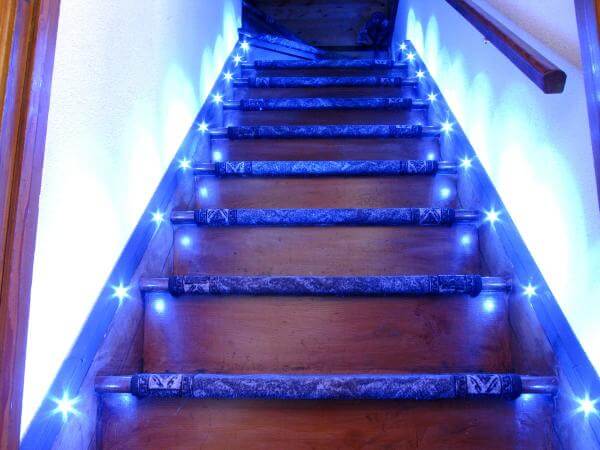

PredishnaIlluminationRules for the choice of lighting for the kitchen and the interior of the installationNextBacklight How to guide the tavan from drywall with backlight