How can you direct the LED strip with your own business?
Title: LED strip light 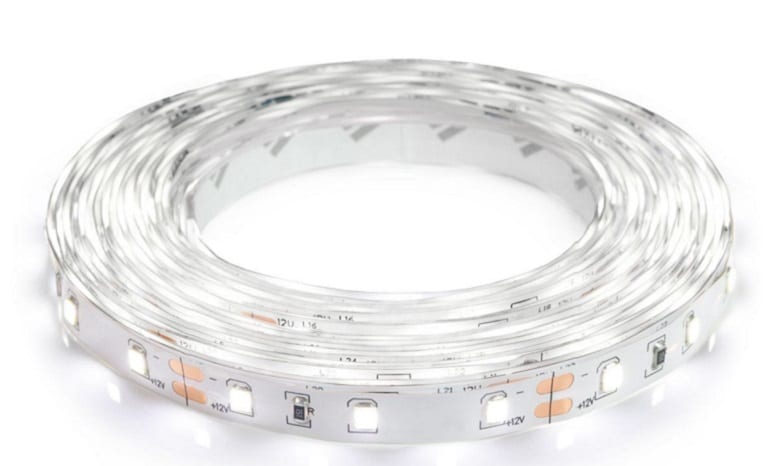
LED tape sa was beaten by crawling for backlighting or cato basically brightening more often from one year. The price for tyah is constantly falling, and the assortment is growing. But if necessary, you can send the LED strip to your own side.
Containment: 1. Advantages on LED tape 2. How to direct the LED strip 3. Shine Control 4. Schemes for installation and connection 5. Helpful video
Advantages on LED tape
 LED strip light
LED lentata ima reditsa predimstva before other sources in the light:
- kato vsichki LED illuminators of the body, the same nai - economical source for lighting;
- Tape ss LED loan small area, can be hidden under the raft, cornice or other inaccessible area;
- nai -to protect the voltage e 12 V, for some reason such a tape is not allowed for use in a humid room;
- gvkavostta on the basis of allowing the device and assembly of the surface to be twisted.
Use for home LED strip
Tozi design can be used for lighting in various places - whether you hide the back of the cornice or the wardrobe, then it is illuminated on the front or the other way around, it will give a romantic look to the flock. Installed in the kitchen, on top of the surface on the kitchen module, still illuminating the work surface, and above the saksiite from the plant stem, add more light to the tah at cloudy time.
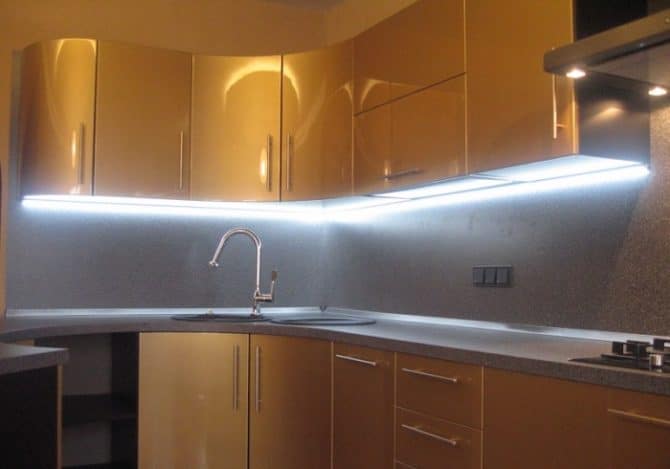 Kitchen lighting with LED strip
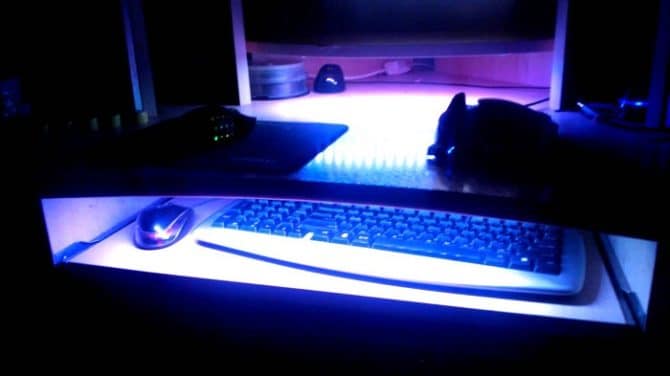
This homemade product can be used in a cola and on a bicycle, such as light lines for a park run or flashers on a car.On the music center, use the RGB controller, the same osiguri light effect - the light blinks in time with the music.
 Illuminated work raft back kjm sdzharzhanieto ↑
How to direct the LED strip
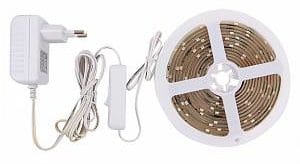
 Production on LED tape
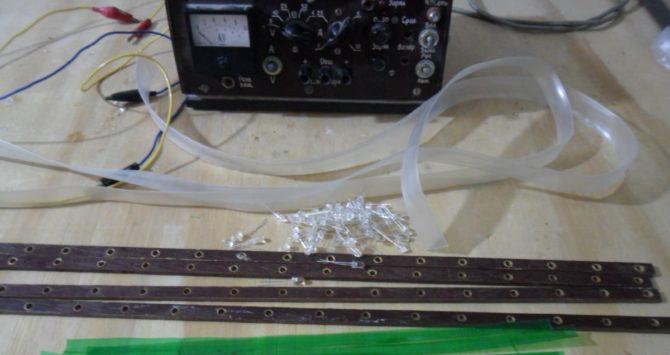
It is much more difficult to send a copy to the factory-directed LED strip near the house. Tova e gavkava printed circuit board, vrhu some self-mounting LEDs and resistors from the SMD series. Near the house, these materials can be replaced with textolite tape and conventional LEDs and resistance to crackling.
Required tools and materials
For yes, send the LED strip yourself, you need to follow the tools:
- a knife or cutter for cutting on a textolite tape;
- an awl or tank drill, corresponding to the debelinate on the crack on the LED and resistor;
- poyanik with spoika and colophon;
- Seshoar was degraded for flooding on a thermoswim mat.
In addition to the tools you need, follow the materials:
- LEDs. The amount depends on the voltage, it is necessary to work on everything from the LED, protect the voltage - 12V or 24V and the desired brightness. The home tape is connected to the battery or USB. When producing on RGB, the tape is necessary for diodes in various colors - red, green and blue.
- Resistors. Those are necessary for limiting the current, changing the pres LED.
- Tape from getinaks or textolite from debelin 0.5 - 1 mm. Ako imate getinax, cover with a folio, you can send a printed handkerchief.
- Sections from the conductor behind the montirana to the verigata. The exact cross section can be anything, but not more than 0.35 mm2, otherwise the case is even harder.
- The tape is torn from an opaque plastic bottle or other thin plastic.Measure the tape on the basin and then measure it on the textolite tape.
- Transparent heat-sealed pipes. The diameter of the tryabva, yes, let me put it on top of the finished tape, and the length of the tryabva, yes, from 30 mm away from it.
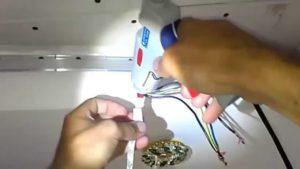
Production process
 LED strip "direct si yourself"
Work on a home LED strip all the way from a few stages:
- Sstaviane on the concept. All LEDs have nominal voltage and current. Vz is based on the goods sa connected in series in a group with a current limiter.
- The textolite tape is broken. The length and breadth of the tapeta trebva and allow the elements of the verigata to be placed on top of it.
- With an awl or tank drill, open it for assembly into parts. Put the LED in the middle, at the same distance from each other, and resistor between the ties, remove or back on the ribbon, depending on the local conditions. For production on RGB strips, dim the LEDs in a reduced color.
- Lentovite elements se vkarvat in punch open.
- All the elements are tied from the body segments with the help of a poyanik according to the diagram.
- Conduct sa drinking for svarzvane.
- For this, an aesthetically pleasing look to the design is added, LED tape and a ragged tape from butylkat will be placed in a transparent heat-sealed tube. Tape for bottles is put on the head on the LED tape.
- Thermosweater needs to be heated from sesoar, for quilting all parts in one brocade. For use in water, for example, in an aquarium, remove the edges of the silicone seal. Tova right design is waterproof.
Light control
Ako just wire the LED tape, I just wire the source on the storage, then the only result is a constant brightness on the light. Ako top LED tape sa install multi-color LEDs, which are also lit at the same time.
For simply dimming from min to max, you can use a dimer with a power of 20% higher than the power on the LED strip.
For good, yes, take the controller, for yes, control the RGB tape.
Election to controller
![]()
![]() LED strip controller
LED strip controller
Without a controller, you can control the brightness by itself on a single-color tape. Over control on multicolor RGB ribbon Izskva controller. The same osiguri possibility for smoothly adjusting to colors and not changing the time of the given program, for example, transfusion. Power mu trebva yes even with 20% higher than the power on the LED tape. In addition to the power, the controllers differ in appearance:
- Controller without remote control. Nai-evtin. Control it all from a vvarshva directly to the device either manually or with the help of a graduated program.
- Controller with infrared (IR) remote control. Takiva consoles work in a frame for visibility up to 10 meters.
- Controller with radio remote control. Takiva remotely work at a distance of up to 20 meters. You can control all things through walls and barriers.
- Controller working through WI-FI channel. Such devices can be connected to equipment from any kind of remote control, but it is possible to control it with the help of a computer or mobile phone, but you can also use the Smart Home system.
Schemes for installation and connection
Globenate the tape se montira on the locality and se svyarzva kam zakhranvane, dimer or RGB controller.
Vrazka kam controller
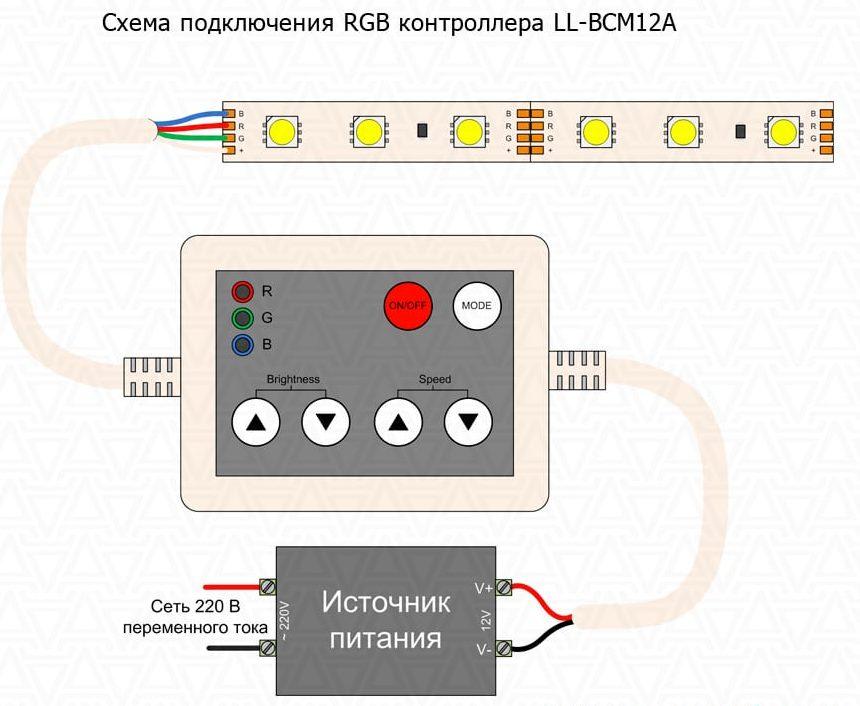 Vrazka kam controller
Controlled and stored se amirate to tape. However, if the LED structures are slightly different, they are located at a significant (several meter) distance from each other, but the RGB repeater is connected to each other.
Tova, lo and behold, for yes, they namali dalzhinat on the cables, which golems wear tokov. For a long time, the length of the cable will fall to the voltage of this solid goal and the light line is weak.
Installation
The design of this fixer for the meat is ready for various starters:
- plastic staples;
- construction in a heat-sealed tube and fixed with a double-sided tape;
- the textolite tape is not sealed;
- silicone sealant or leaky nails.
Attention! For fastening to the tape without heat-sealed pipes, the seal is not lost from the crawl.
Send the LED strip yourself, you can replace it ready, but in any case it is suitable for the task.
On the Internet, you can watch videos on how to direct the LED strip „direct it yourself“.
Helpful video
PreviousLED strip lightNextSvetlinna LED tapeConnection and control on LED tape kjm arduino