Connection and control on the LED tape kjm arduino
Title: Svetlinna LED strip 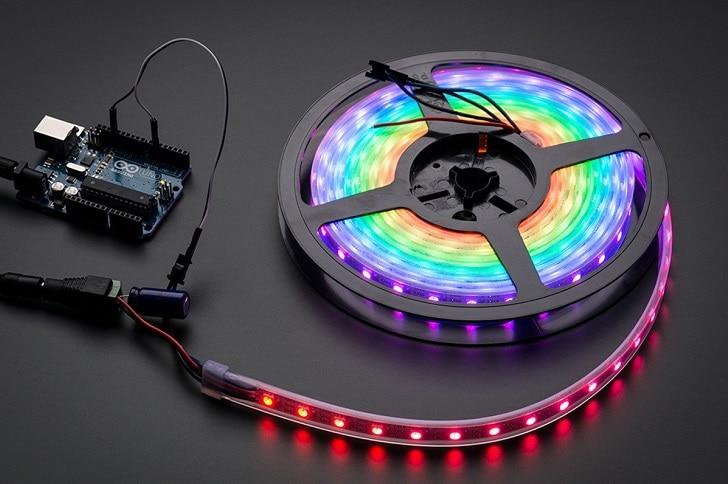
Throw on the illumination of the body long ago, including multi-color RGB LED strip... For control on these devices, I used the RGB controller. But osven him prez the last year of this year from crawling and the Arduino scarf.
containment: 1. Arduino - the principle to work 2. Principle for control on a natovarvanetto via Arduino 3. Connected to the LED tape kjm Arduino 4. Sample program 5. Video instruction
Arduino - principle for action
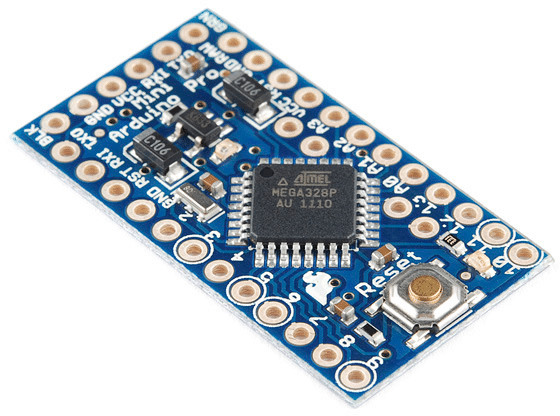
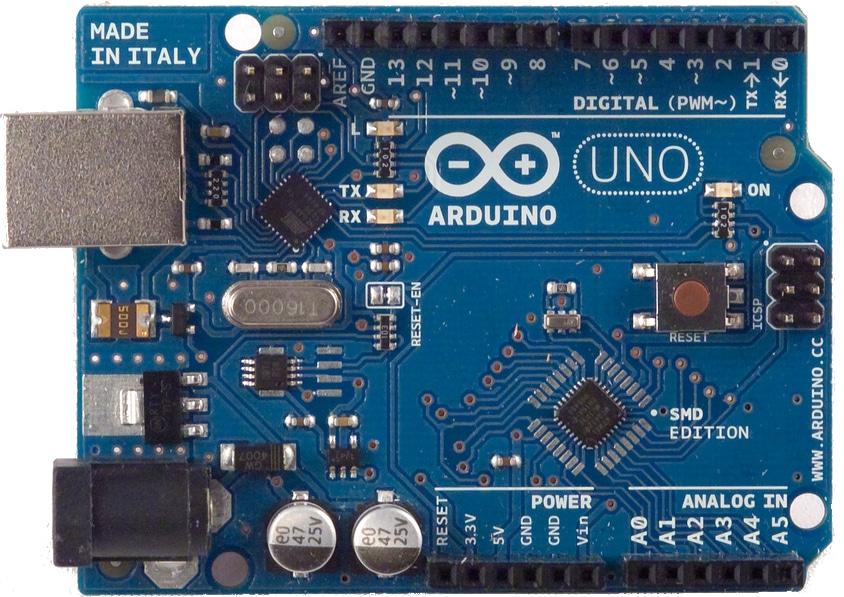
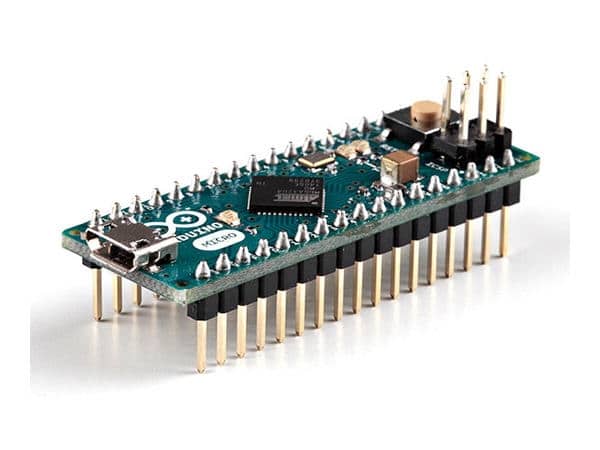
 arduino board
The Arduino board is a device on which we install the microcontroller. Here you can connect various sensors, controls or encoders, and then add a sketch (program) of a scarf that controls motors, LEDs and other shutter mechanisms, including other Arduino scarves, using the SPI protocol. The device can be controlled via remote control, Bluetooth module, HC-06, Wi-Fi, ESP or internet and button. Some of the most popular boards are the Arduino Nano and Arduino Uno, such as the Arduino Pro Mini, a device based on the ATmega 328 microcontroller.
The programming is done in an environment with the Arduino code open, installed on the ordinary computer. Program your USB charger.
Principle for control on a natovarvanetto via Arduino
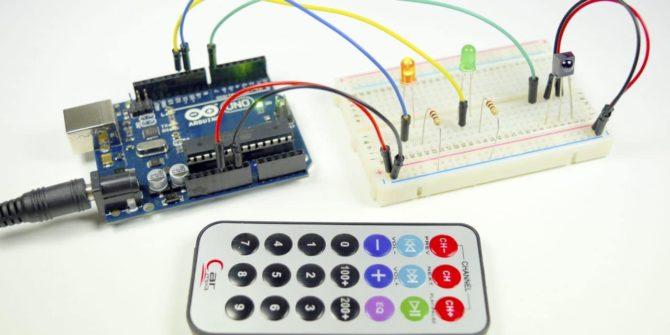
 Arduino control
There is a lot of work on the platkata, such as digital, with two states - on and off, and analog, controlled through a PWM controller with a frequency of 500 Hz.
But avoid projecting a current of 20 - 40 mA with a voltage of 5 V. It is sufficient for storing an RGB indicator LED or a 32 × 32 mm LED matrix module. For a powerful product, the goods are not enough.
For yes, solve these problems in many projects, try and get additional devices:
- Relay. In addition, a relay section with 5V protects the voltage and the target of the kit with different contacts, such as from the starter gate.
- Bipolar transistor amplifiers. The power output of the device is not limited by the control current, but you can bend the wire from a few elements or use a transistor circuit.
- FET or MOSFET transistors. They can control products with a current of as little as an ampere and a voltage of up to 40 - 50 V. When connected to a PWM mosfet and an electric motor or other inductive product, a protective diode is required. If it is connected to a LED or LED lamp, it is not necessary.
- Expander scarves.
Connected to the LED tape kjm Arduino
 connected to the LED tape kjm Arduino
via relay
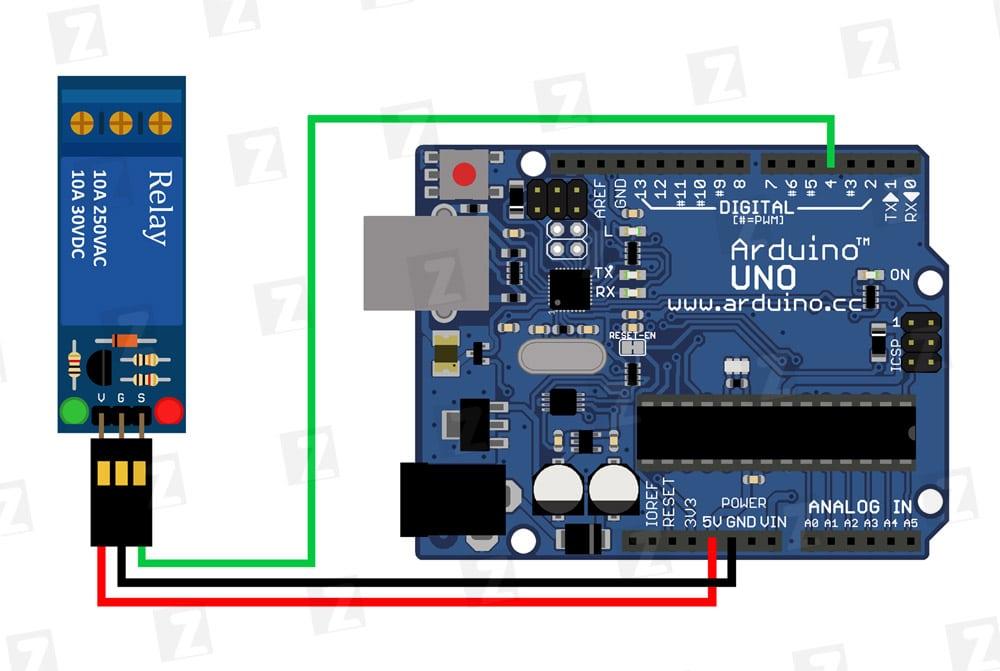 Relayna vrazka
The relay is connected to a device for digital output. Controlled by non-government help tape ima itself two states - on and off. Three relays are required for driving on a red-blue-green ribbon. Tokt, some such device can be controlled, it is limited by the power per bobbin (winding from a low power cannot and close the contacts). Relay climbed all the way for a connection to a higher power.
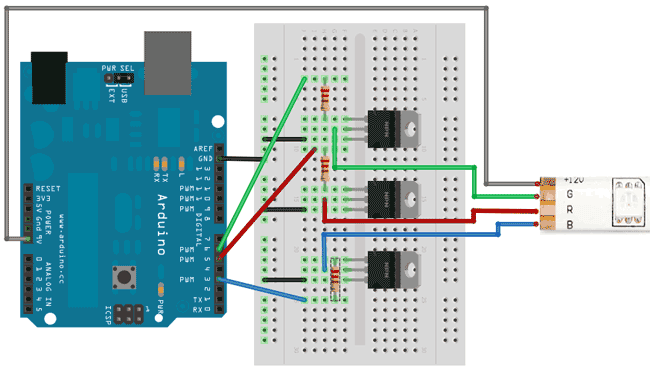
Use on a bipolar transistor
 Insertion with transistor
A bipolar transistor can be used for powering up current and voltage. I chose the current on the Natovarvana and the voltage. The control current does not try and be up to 20 mA, for some reason by supplying a current limiting resistor from 1 - 10 kOhm.
It's better to use the transistor n-p-n with common emitter. For a high-powered amplifier, it is from the use of a multi-element circuit or a transistor input (a microcircuit for an amplifier).
Use a field effect transistor
In addition to the bipolar, for the control on the tape, field-effect transistors are used. Another name for the device is MOS or MOSFET transistor.
So the element, for the difference from bipolarity, is not controlled by current, but by voltage on the port. Tova allowed a low current on the port and a controller of the golem current on the natovarvane - up to a dozen amperes.
The element is connected through a current limiting resistance. In addition, the noise is also sensitive, so the controller will be shaking if the ground is connected to a 10 kΩ resistor.
Used on maps for extension
 Arduino plug-in with help to expansion boards
In addition to the relay and transistors, they are used to prepare the block and expander scarves.
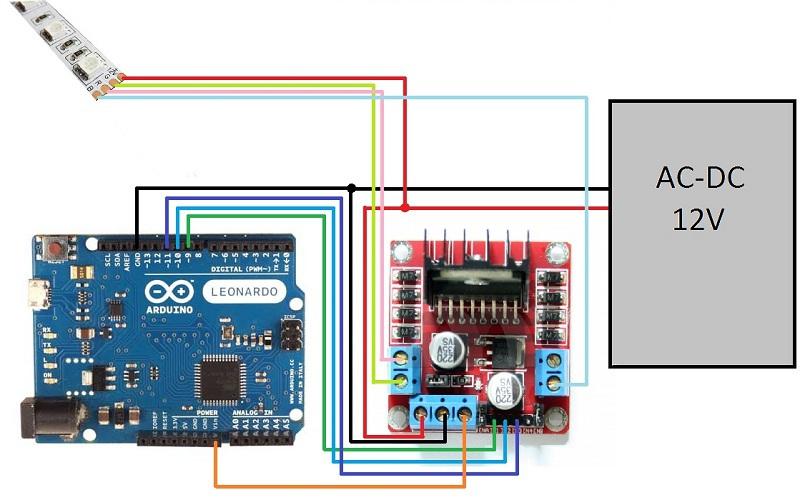
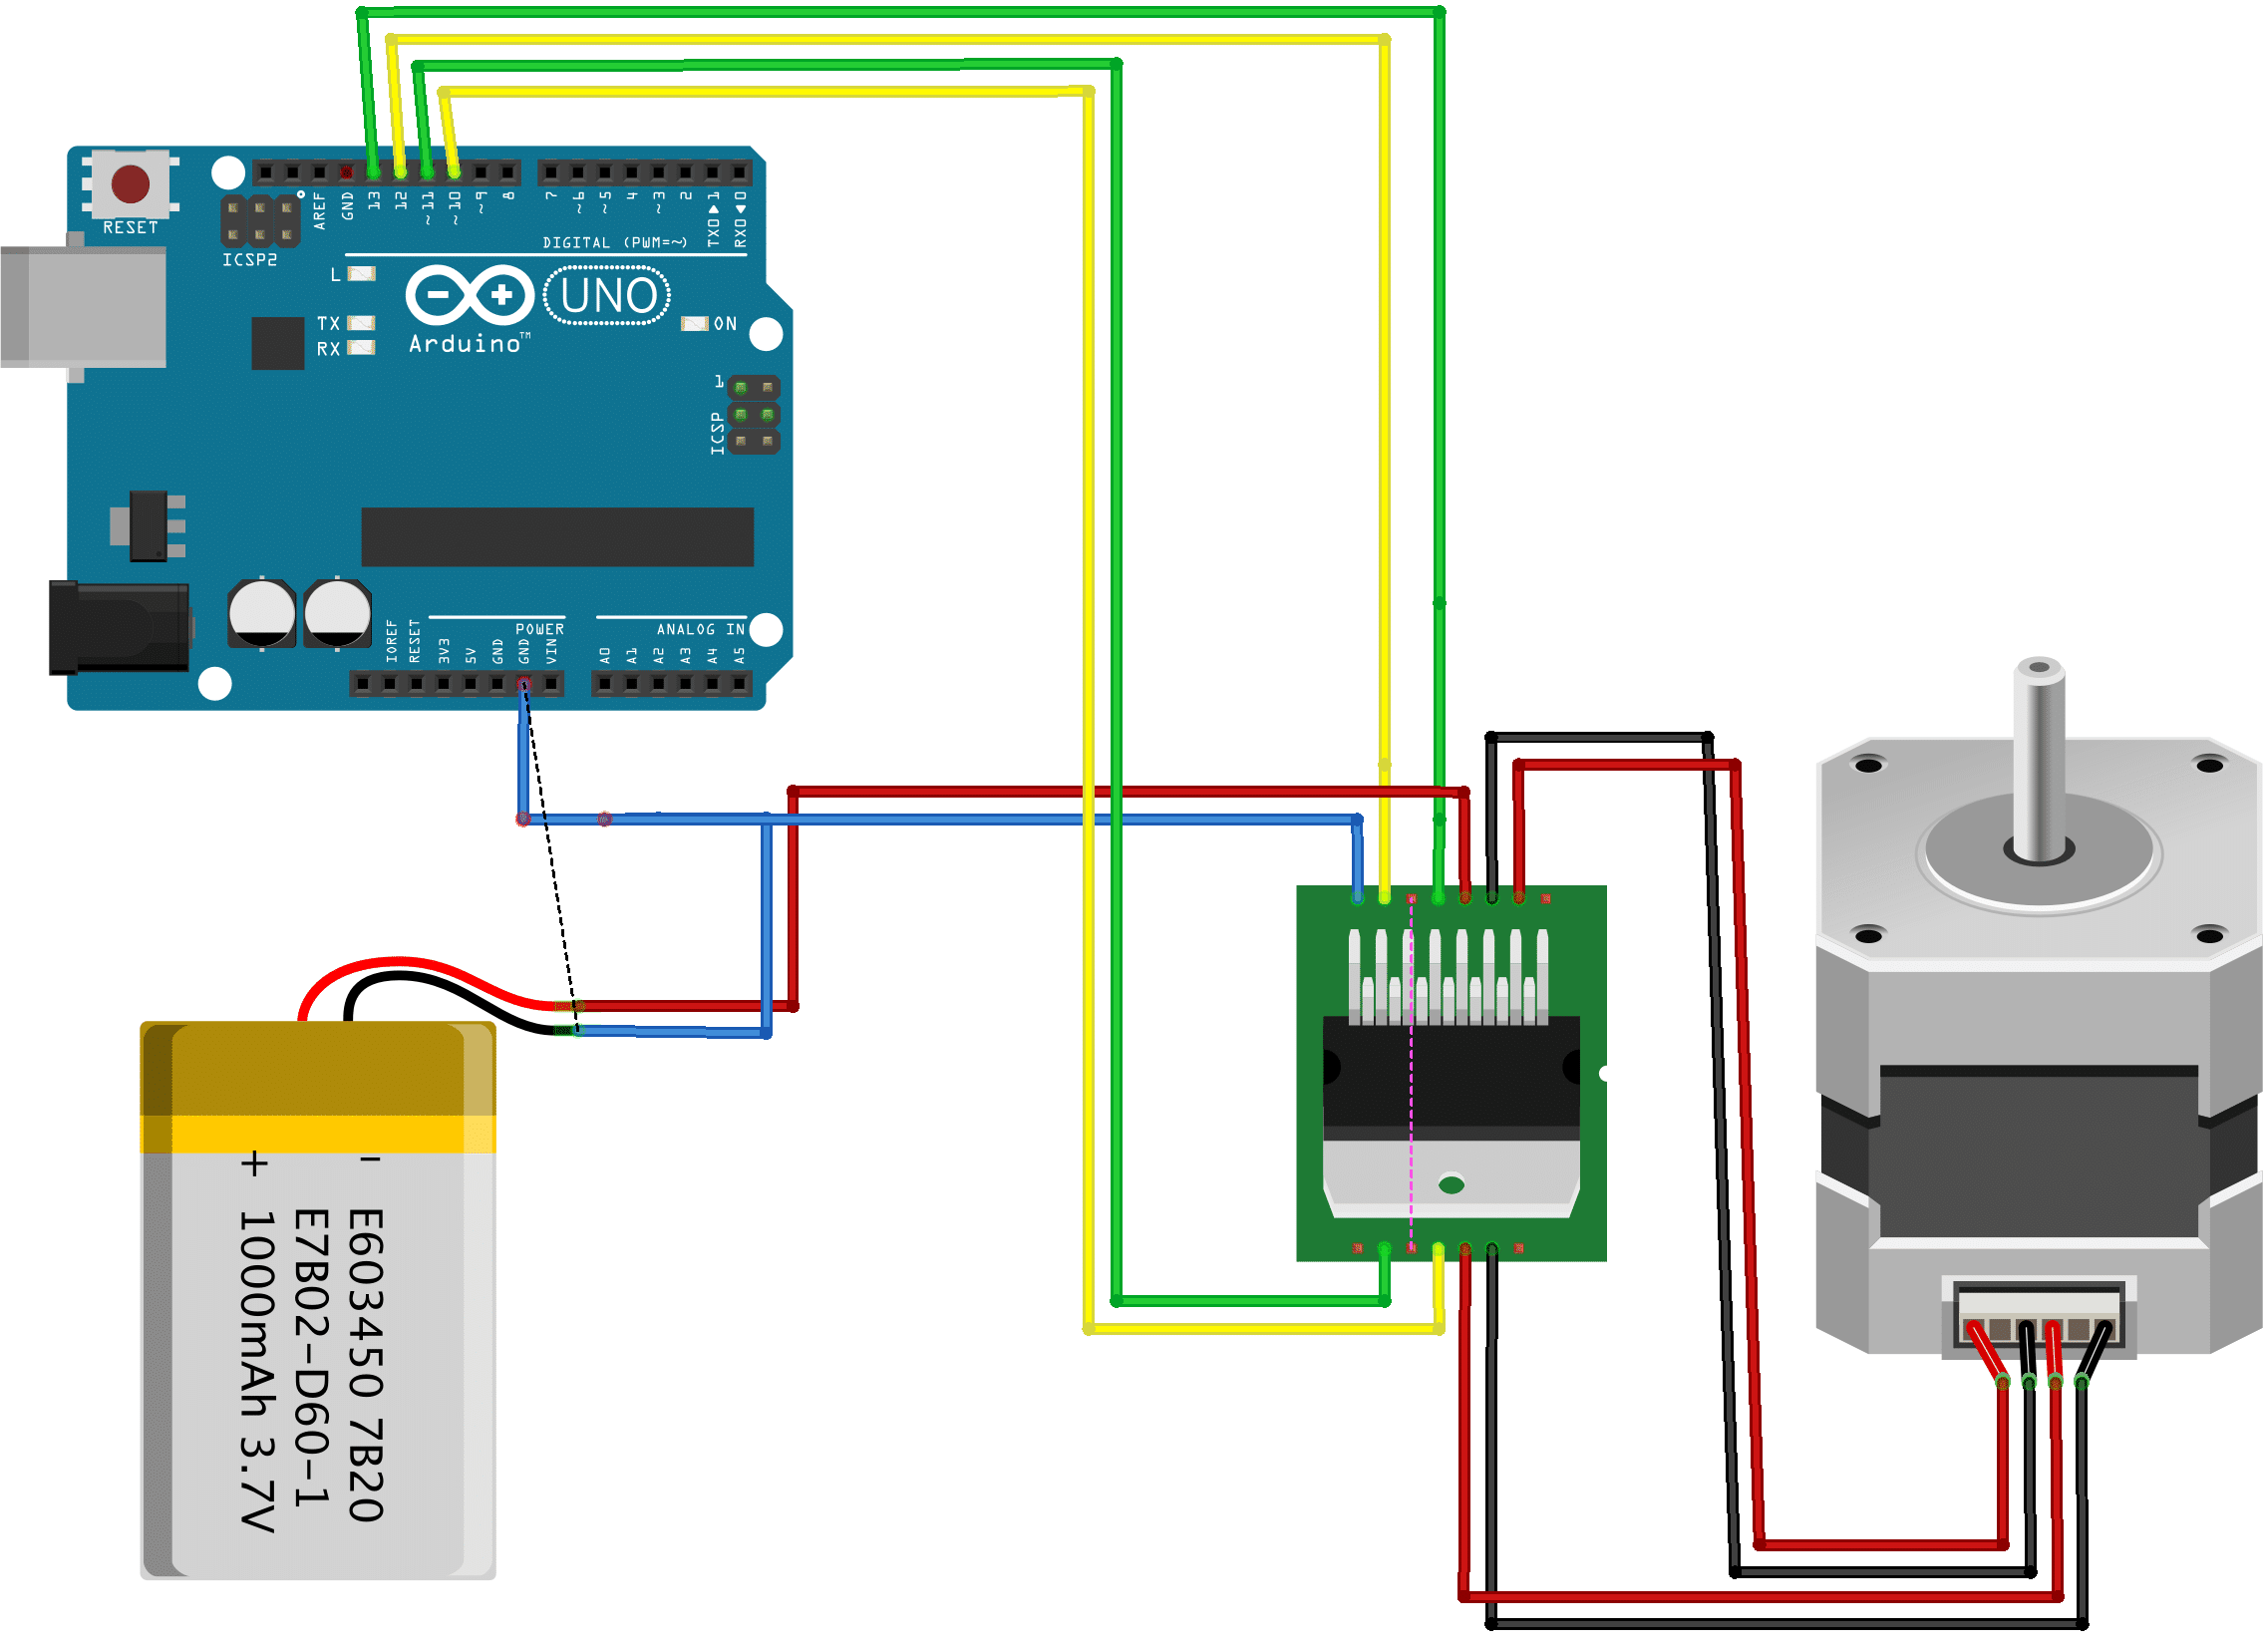
You can also use Wi-Fi or Bluetooth, a driver for the motor cato module L298N or an equalizer. Designed to control products with different power and voltage. Such devices are single-channel - they can control the monochrome tape itself and multi-channel - intended for RGB and RGBW devices, such as tape with WS 2812 LED.
Sample program
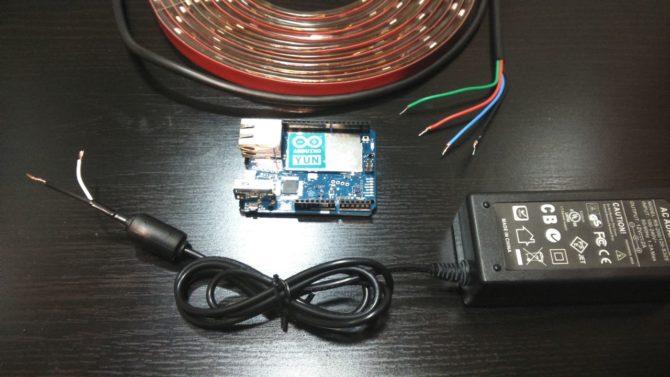
 Arduino and LED strip
Plug the Arduino board into a state and control the LED structure and pre-define the program. You can either set up technical libraries on the Internet or write a new skit (code) yourself. You can, yes, such a device is your own.
These are some cases on the basis of the takiwa system:
- Lighting control. With the help of the light sensor, the light is in the flock, including somehow a vednaga, and with a gradual increase in brightness, climbed onto the sun. It can also be switched on via wi-fi, integrated into the "smart home" system or via telephone connection.
- Turn on the light on the pillar or in the long corridor.Diodnoto clarification for every step separately from a lot of hubby. When the motion sensor is not connected to the scoreboard, it is not ready to be activated and brought to the sequential switching on on the lighting on the steps or corridor with a darkening, and deactivated on the tosi element, again bringing the process to the reverse.
- Colored music. After applying to the audio signal, pre-filter the analog to the input, otherwise it is a color-musical installation.
- Computer modirane. With the help of suitable sensors and software, the color of the LED may depend on the temperature or the hardware of the processor or RAM. This is the device for working on the dmx 512 protocol.
- Controlling the speed on the lightline with the help of the encoder. Takiva installations are sglobyavat on chips WS 2811, WS 2812 and WS 2812B.
Video instruction
PredishnaSvetlinna LED strip How can you direct the LED strip with your own system?NextSvetlinna LED strip What is the controller for the LED strip and how can we choose it